Infinite Scrolling Pagination in Flutter
Learn how to implement infinite scrolling pagination (also known as lazy loading) in Flutter using the Infinite Scroll Pagination package. By Edson Bueno.
Swapping List Widgets
Swap the old ArticleListView for your fresh PagedArticleListView. For that, open lib/ui/list/article_list_screen.dart and add an import to your new file at the top:
import 'package:readwenderlich/ui/list/paged_article_list_view.dart';
Since you’re already working with the imports, take the opportunity to do some cleaning by removing the soon-to-be unused ArticleListView import:
import 'package:readwenderlich/ui/list/article_list_view.dart';
Jump to the build() and replace the Scaffold‘s body property with:
body: PagedArticleListView(
  repository: Provider.of<Repository>(context),
  listPreferences: _listPreferences,
),
You’re obtaining a Repository instance from Provider, your dependency injection system for this project.
That’s it! You can delete the now obsolete lib/ui/list/article_list_view.dart.
Build and run. You should see your Placeholder in action:
Engineering Infinite Scrolling Pagination
In the whole drink service situation above, you looked at infinite scrolling pagination from a product perspective. Now, put your developer glasses on, divide your goal into pieces and examine what it takes to conquer it:


- Watch the user’s scroll position so that you can fetch other pages in advance.
- Keep track of and transition between every possible status in your list.
- Keep the user posted by displaying indicators for each different status.
- Make a solution that’s reusable in different screens, possibly using other layouts. One example of this is grids. Ideally, this solution should also be portable to different projects with other state management approaches.
Sounds like hard work? It doesn’t have to be. These issues are already addressed by the Infinite Scroll Pagination package, which will be your companion for this article. In the next section, you’ll take a closer look at this package.
Getting to Know the Package
Warm up by opening pubspec.yaml and replacing # TODO: Add infinite_scroll_pagination dependency here. with infinite_scroll_pagination: ^3.1.0:
dependencies:
  flutter:
    sdk: flutter
  infinite_scroll_pagination: ^3.1.0
Download your newest dependency by clicking on Pub get in the Flutter commands bar at the top of your screen.
The Infinite Scroll Pagination package makes your job as easy as stealing candy from a baby, shooting fish in a barrel or assembling a three-piece jigsaw puzzle. Speaking of the latter, here’s your first piece:
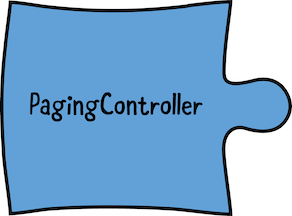
PagingController is a controller for paged widgets. It’s responsible for holding the current state of the pagination and request pages from its listeners whenever needed.
If you’ve worked with Flutter’s TextEditingController or ScrollController, for example, you’ll feel at home with PagingController.
Instantiating a PagingController
Back to lib/ui/list/paged_article_list_view.dart, add an import to the new library at the top of the file:
import 'package:infinite_scroll_pagination/infinite_scroll_pagination.dart';
Now, replace // TODO: Instantiate a PagingController. with:
// 1
final _pagingController = PagingController<int, Article>(
  // 2
  firstPageKey: 1,
);

@override
void initState() {
  // 3
  _pagingController.addPageRequestListener((pageKey) {
    _fetchPage(pageKey);
  });
  super.initState();
}

Future<void> _fetchPage(int pageKey) async {
  // TODO: Implement the function's body.
}

@override
void dispose() {
  // 4
  _pagingController.dispose();
  super.dispose();
}
Here’s a step-by-step explanation of what the code above does:
- When instantiating a
PagingController, you need to specify two generic types. In your code, they are:-
int: This is the type your endpoint uses to identify pages. For the raywenderlich.com API, that’s the page number. For other APIs, instead of a page number, that could be aStringtoken or the number of items to offset. Due to this diversity of pagination strategies, the package calls these identifiers page keys. -
Article: This is the type that models your list items.
-
- Remember the
intyou specified as a generic type in the previous step? Now you need to provide its initial value by using thefirstPageKeyparameter. For the raywenderlich.com API, page keys start at1, but other APIs might start at0. - This is how you register a callback to listen for new page requests.
- Don’t forget to
dispose()your controller.
Fetching Pages
Your _fetchPage() implementation doesn’t have much use as it is right now. Fix this by replacing the entire function with:
Future<void> _fetchPage(int pageKey) async {
  try {
    final newPage = await widget.repository.getArticleListPage(
      number: pageKey,
      size: 8,
      // 1
      filteredPlatformIds: _listPreferences?.filteredPlatformIds,
      filteredDifficulties: _listPreferences?.filteredDifficulties,
      filteredCategoryIds: _listPreferences?.filteredCategoryIds,
      sortMethod: _listPreferences?.sortMethod,
    );

    final previouslyFetchedItemsCount =
        // 2
        _pagingController.itemList?.length ?? 0;

    final isLastPage = newPage.isLastPage(previouslyFetchedItemsCount);
    final newItems = newPage.itemList;

    if (isLastPage) {
      // 3
      _pagingController.appendLastPage(newItems);
    } else {
      final nextPageKey = pageKey + 1;
      _pagingController.appendPage(newItems, nextPageKey);
    }
  } catch (error) {
    // 4
    _pagingController.error = error;
  }
}
This is where all the magic happens:
- You’re forwarding the current filtering and sorting options to the repository.
-
itemListis a property ofPagingController. It holds all items loaded so far. You’re using the?conditional property access becauseitemListinitial value isnull. - Once you have your new items, let the controller know by calling
appendPage()orappendLastPage()on it. - If an error occurred, supply it to the controller’s
errorproperty.
Build and run to make sure you haven’t introduced any errors. Don’t expect any visual or functional changes.
Using a Paginated ListView
Before you move on to the build(), there’s something you need to know:

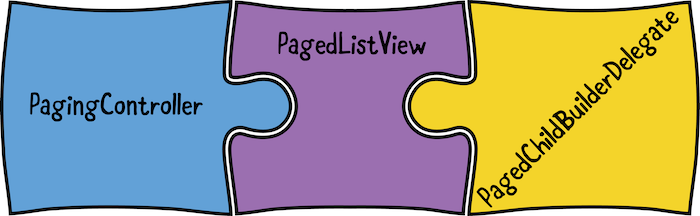
The second piece is exactly what its name suggests: a paginated version of a regular ListView. And as the illustration shows, it’s in there that you’ll fit in your controller.
Still on lib/ui/list/paged_article_list_view.dart, replace the old build() with:
@override
Widget build(BuildContext context) =>
    // 1
    RefreshIndicator(
      onRefresh: () => Future.sync(
        // 2
        () => _pagingController.refresh(),
      ),
      // 3
      child: PagedListView.separated(
        // 4
        pagingController: _pagingController,
        padding: const EdgeInsets.all(16),
        separatorBuilder: (context, index) => const SizedBox(
          height: 16,
        ),
      ),
    );
Here’s what’s going on:
- Wrapping scrollable widgets with Flutter’s
RefreshIndicatorempowers a feature known as swipe to refresh. The user can use this to refresh the list by pulling it down from the top. -
PagingControllerdefinesrefresh(), a function for refreshing its data. You’re wrapping therefresh()call in aFuture, because that’s how theonRefreshparameter from theRefreshIndicatorexpects it. - Like the good old
ListViewyou already know,PagedListViewhas an alternativeseparated()constructor for adding separators between your list items. - You’re connecting your puzzle pieces.
Building List Items
After all this, you suspect something might be wrong — after all, what’s going to build your list items?
The good Sherlock Holmes that you are, you investigate by hovering your magnifying glass — also known as a mouse — over PagedListView:

Well done, detective. You found the missing puzzle piece!
Now, it’s time to put them all together!