Custom Fonts: Getting Started
Learn how to use custom fonts on iOS with Storyboards, UIKit and SwiftUI. By Yusuf Tör.
Updating for Dynamic Type in Storyboards
To update your storyboard label for Dynamic Type, open Main.storyboard, click the Swift Apprentice label and check the Automatically Adjusts Font checkbox in the Attributes inspector:
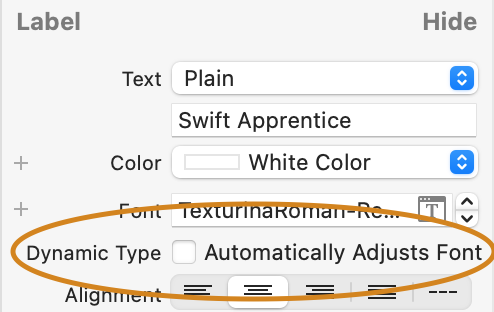
This tells the label that it should automatically adjust the font size when the user’s preferred text size changes. To do this, the label needs to use a scaled instance of a font. For system fonts, you do this by assigning the label a specific text style in the Attributes inspector. However, for custom fonts, you need to provide the scaled instance of the font via code.
So, open UIFont+CustomFont.swift and add the following inside the extension:
func dynamicallyTyped(withStyle style: UIFont.TextStyle) -> UIFont {
  let metrics = UIFontMetrics(forTextStyle: style)
  return metrics.scaledFont(for: self)
}
This creates a UIFontMetrics object that specifies the text style and then passes your custom font to scaledFont(for:) to create a scaled font based on the text style.
Open BookListViewController.swift and add the following to the end of the class:
private func dynamicallyTypeFirstBookLabel() {
  firstBookLabel.font = firstBookLabel.font.dynamicallyTyped(withStyle: .title1)
}
In viewDidLoad(), add the following after addSecondBookLabel():
dynamicallyTypeFirstBookLabel()
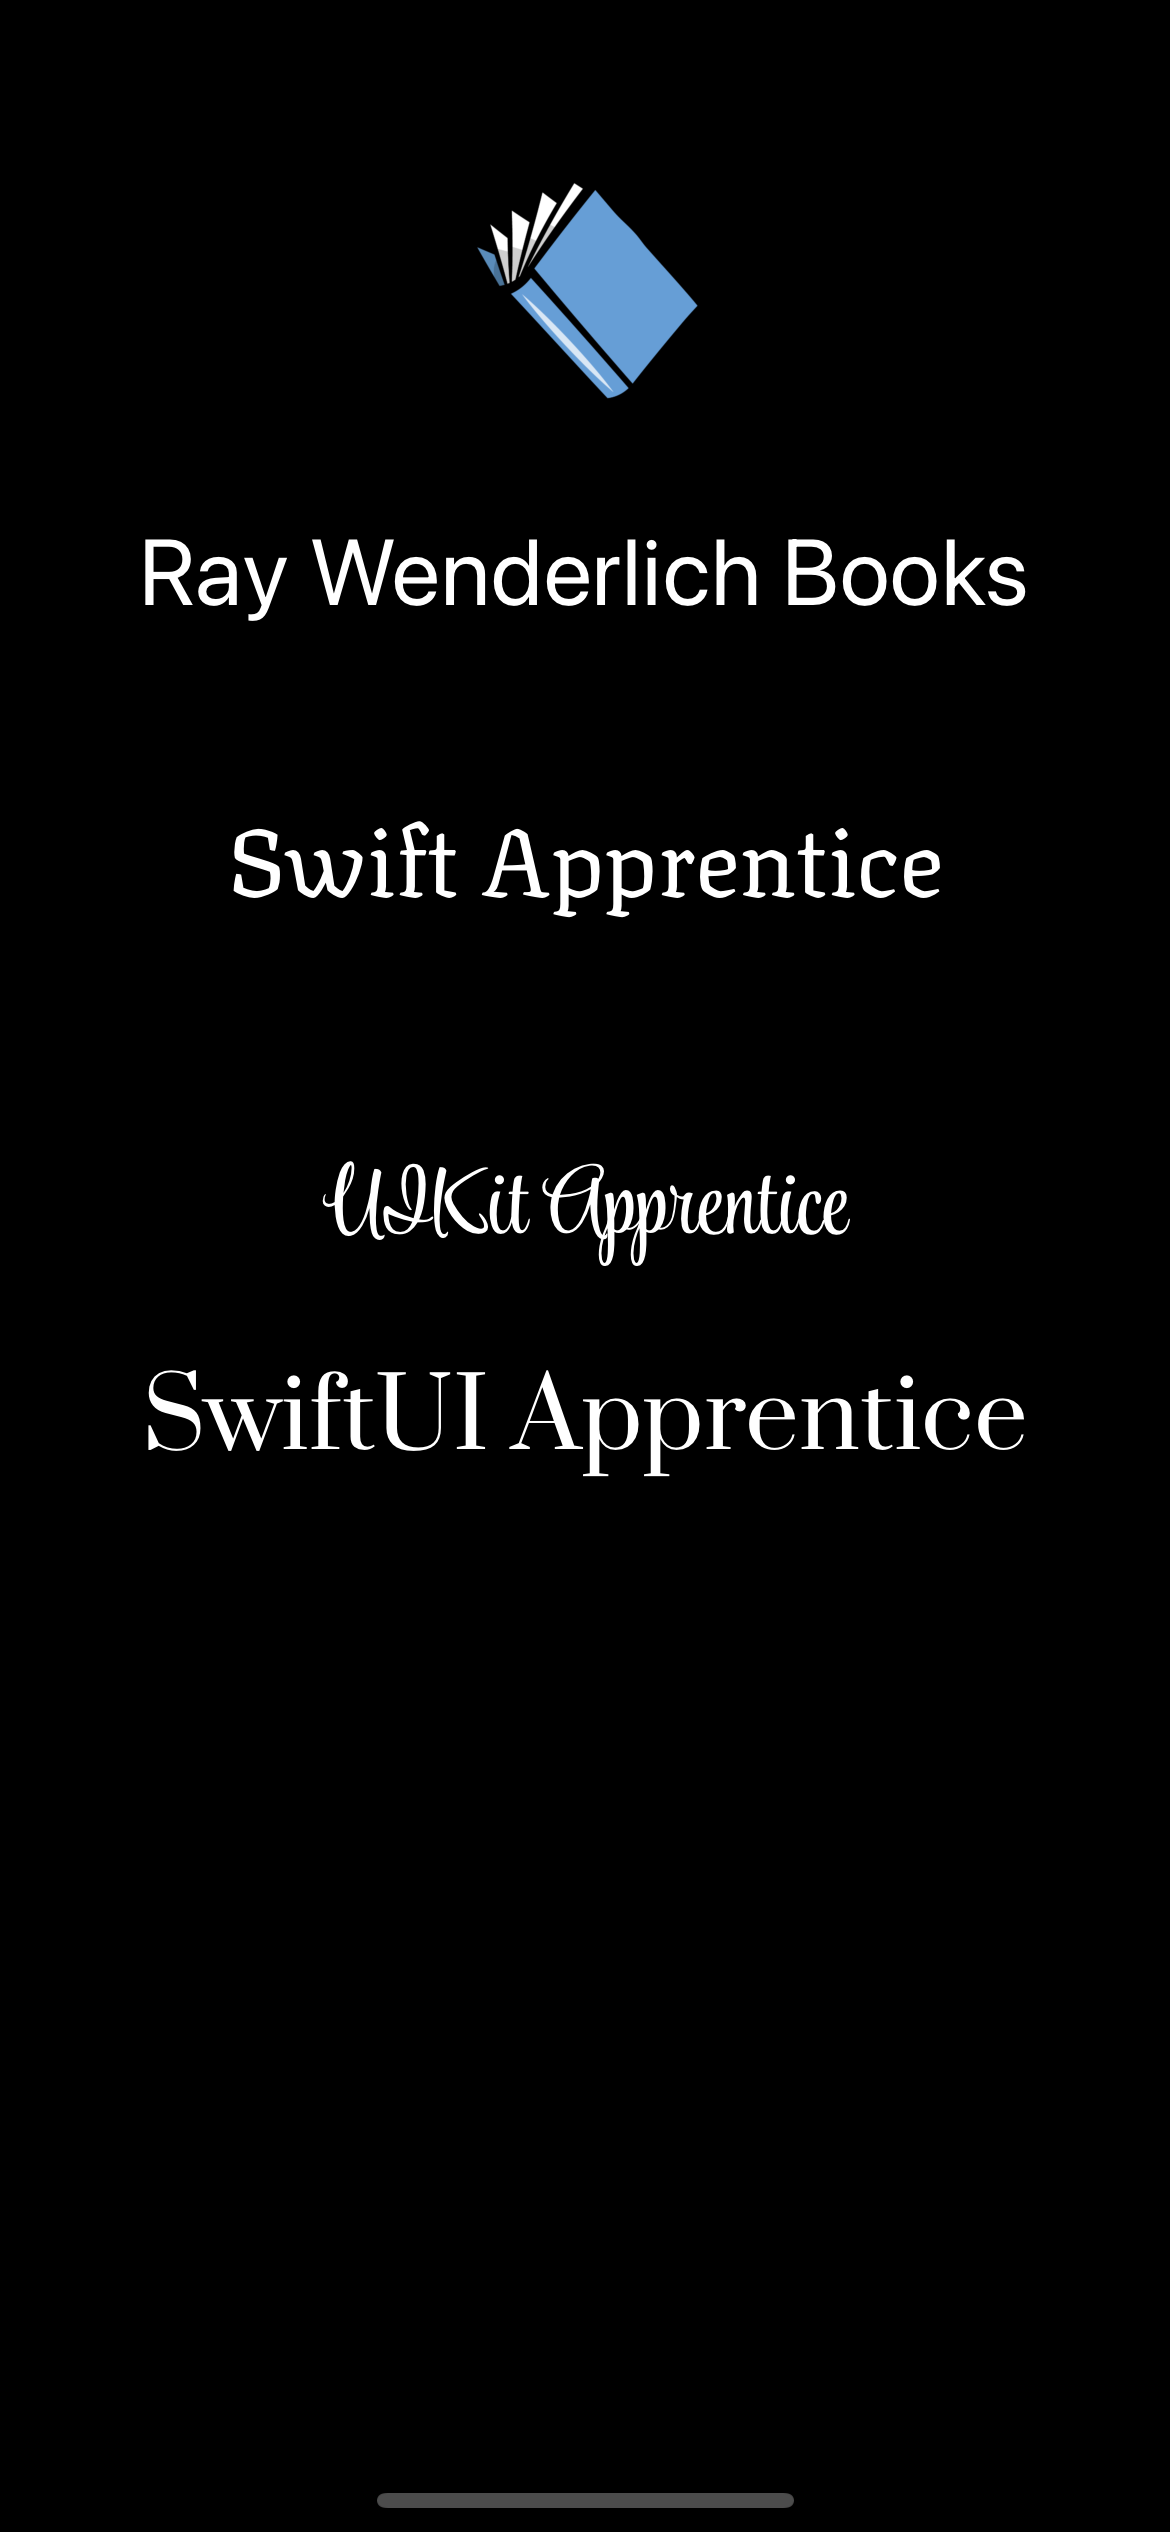
Build and run. You’ll see something like this:

Unless you’re already using accessibility features on your device, you’ll notice there’s no visual change.
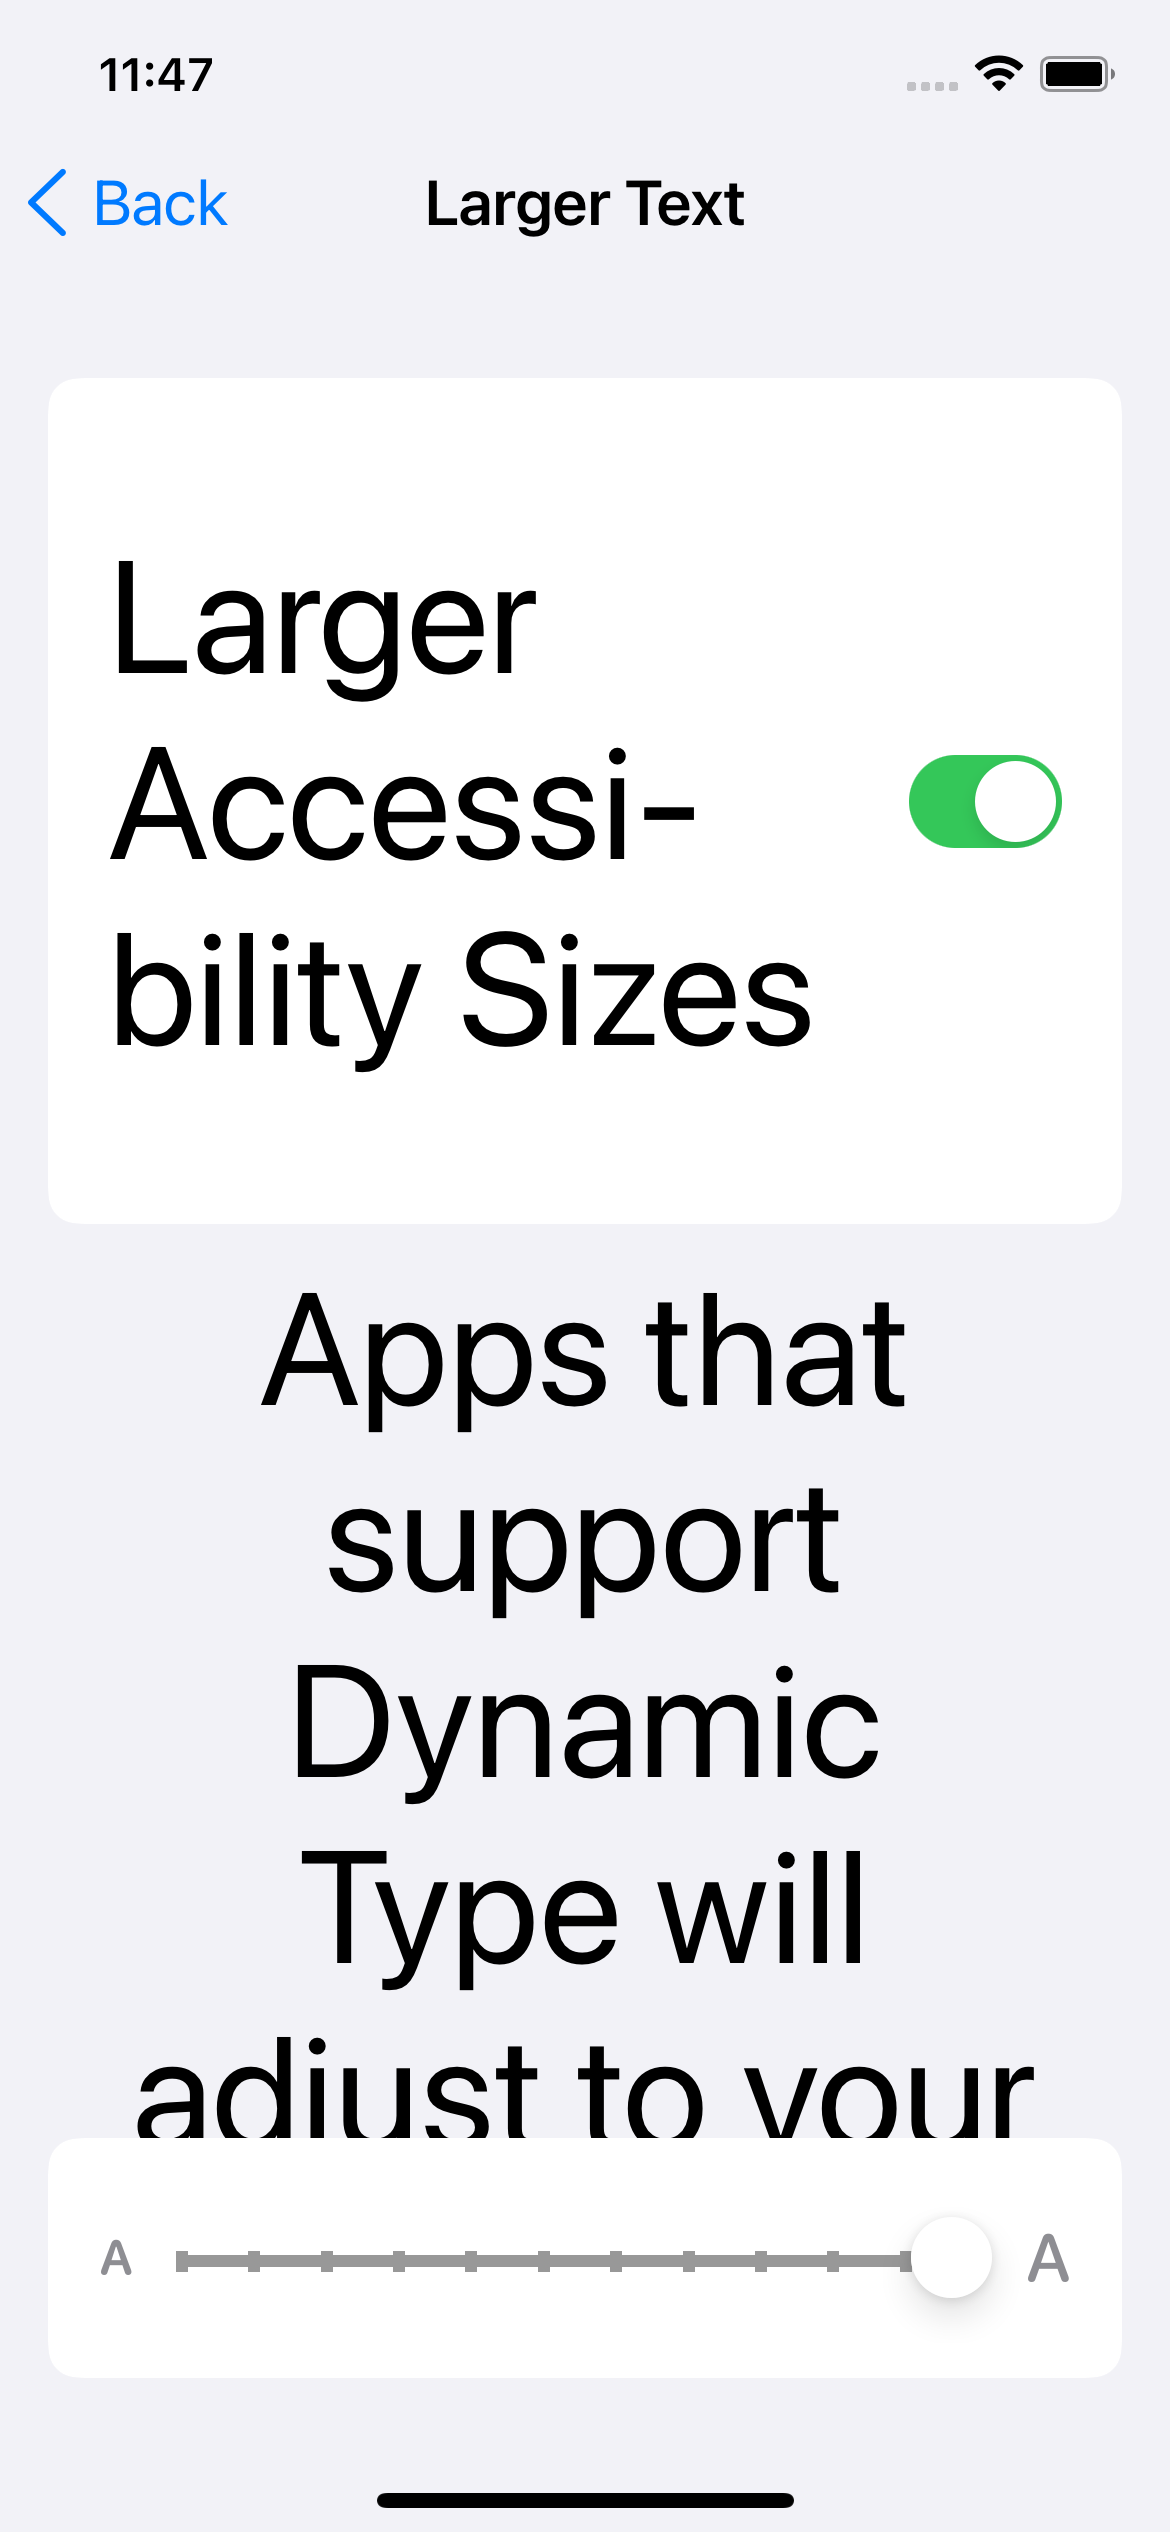
Open your Settings app, tap Accessibility, then tap Display & Text Size, and tap Larger Text. To see an obvious change in text size within your app, flip the Larger Accessibility Sizes switch to the on position. Then drag the text size slider at the bottom to the maximum value:
Head back to your app to take a look.

You’ll see the text in both the first and last label has increased in size. That’s the Storyboard label and the SwiftUI label changing size automatically. The code you just added is what controls the Storyboard label. But why did the SwiftUI label also change?
Updating for Dynamic Type in SwiftUI
As you saw, the SwiftUI label text size increased despite not having specified it. That’s because it scales with the body text style by default. However, since you want a title style, rather than a body style, you’ll need to change that.
In Font+CustomFont.swift, replace prataFont(size:) with:
static func prataFont(
  withStyle style: Font.TextStyle,
  size: CGFloat
) -> Font {
  return .custom("Prata-Regular", size: size, relativeTo: style)
}
This now returns your custom font relative to a specified text style.
Update your SwiftUI label by going to BookTitleView.swift and replacing .font(.prataFont(size: 16)) with:
.font(.prataFont(withStyle: .title, size: 16))
Build and run.

You’ll see that your third label scales correctly for its text style now.
But what about the middle label? That is the one created with UIKit programmatically. It’s time to support Dynamic Type in that one too!
Updating for Dynamic Type in UIKit Programmatically
To support Dynamic Type in a programmatically created label, you’ll need to make some changes to your UIFont extension. Open UIFont+CustomFont.swift and replace scriptFont(size:) with the following:
static func scriptFont(
  withStyle style: UIFont.TextStyle,
  size fontSize: CGFloat
) -> UIFont {
  guard let customFont = UIFont(
    name: "StyleScript-Regular",
    size: fontSize)
  else {
    let descriptor = UIFontDescriptor
      .preferredFontDescriptor(withTextStyle: style)
    return UIFont(descriptor: descriptor, size: descriptor.pointSize)
  }
  return customFont.dynamicallyTyped(withStyle: style)
}
This method’s job is to create a UIFont object for the StyleScript-Regular font at a given size and with a given style. First, you find the font and then, you use the previously created method, dynamicallyTyped(withStyle:), to scale your custom font. However, if the custom font initialization fails for any reason, a fallback UIFontDescriptor provides a system font that matches the specified text style.
Now open BookListViewController.swift, and in addSecondBookLabel(), replace label.font = UIFont.scriptFont(size: 16) with:
label.adjustsFontForContentSizeCategory = true
label.font = UIFont.scriptFont(withStyle: .title1, size: 16)
This tells the label to adjust the font size automatically when the user’s preferred text size changes. Then, it assigns your scaled font to the label.
Build and run. Now all the labels support Dynamic Type!
Feel free to play around with the font size from the Settings app and see how the font scales as you do.
Extending Dynamic Type
Sometimes, you might want to adjust the layout and sizing of non-text elements on the screen based on the user’s preferred font size. You’ll employ that technique here to adjust the size of the book image at the top of the screen.
Open BookListViewController.swift and add the following below addSwiftUILabel(_:):
override func traitCollectionDidChange(
  _ previousTraitCollection: UITraitCollection?
) {
  // 1
  super.traitCollectionDidChange(previousTraitCollection)

  // 2
  let preferredContentSizeCategory = traitCollection
    .preferredContentSizeCategory

  // 3
  switch preferredContentSizeCategory {
  case .accessibilityLarge,
    .accessibilityExtraLarge,
    .accessibilityExtraExtraLarge:
    bookHeightConstraint.constant = 200
  case .accessibilityExtraExtraExtraLarge:
    bookHeightConstraint.constant = 300
  default:
    bookHeightConstraint.constant = 100
  }

  // 4
  view.layoutIfNeeded()
}
This method is automatically called every time the user updates text size preferences. You handle these changes by:
- Calling the superclass’s implementation so that UIKit can do anything it needs to itself.
- Getting the
preferredContentSizeCategory, which is the font sizing option preferred by the user. - Adjust the height constraint attached to the book image view depending on the value of
preferredContentSizeCategory. - Telling the view to update its layout.
This method only gets called when the preferred font size changes. If the user sets their preferred text size before opening the app, it won’t call the method, and the image view won’t be the correct size. For this reason, you’ll need to call it when the view loads.
Add the following to the bottom of viewDidLoad():
traitCollectionDidChange(nil)
Then, build and run.
With your preferred font size set to the largest setting, you’ll see the book image view has now increased in size:

Play around with different preferred text sizes to confirm your code works as expected.
You’ve now successfully employed Dynamic Type to adjust UI elements other than text. And that’s also the end of the tutorial where you’ve learned all about custom fonts!
Where to Go From Here?
Download the completed project files by clicking the Download Materials button at the top or bottom of the tutorial.
In this tutorial, you learned:
- The history of fonts.
- Installing and use custom fonts in your project.
- Using custom fonts in Storyboards, SwiftUI elements and programmatically created UIKit elements.
- Supporting Dynamic Type, including using it to scale non-text UI elements.
You can now use this knowledge to create a more polished-looking app and wow your users!
If you’d like to learn more about supporting Dynamic Type within your app, check out our Dynamic Type video course. Or, read our Auto Layout by Tutorials book for more information about managing Dynamic Type in your layout.
We hope you enjoyed this tutorial. If you have any questions or comments, please join the forum discussion below!