Capturing Text From Camera Using SwiftUI
Learn how to capture text from the iPhone camera into your SwiftUI app so your users can enter data more quickly and easily. By Audrey Tam.
Setting the Button’s Action
Now back to making your UIButton.
In makeUIView(context:), replace the button declaration with the following:
let textFromCamera = UIAction.captureTextFromCamera(
  responder: context.coordinator,
  identifier: nil)
let button = UIButton(primaryAction: textFromCamera)
You create a UIAction to capture text from the camera with your Coordinator object as the responder.
Then, you create the button with this action as its primary action. This sets the button’s title and image to the action’s title and image.
So what does this look like? Set up a preview to see…
Add this code, below ScanButton:
struct ScanButton_Previews: PreviewProvider {
  static var previews: some View {
    ScanButton(text: .constant(""))
      .previewLayout(.sizeThatFits)
  }
}
The preview canvas appears.
If the app is still running on your phone, stop it.
Select a simulator in the run destination menu, then press Option-Command-P or click Resume to see this:
Button preview

Button preview
The sizeThatFits is actually the full screen size of the selected simulator. You’ll trim it down in AddPersonView by setting width and height values for its frame.
Adding ScanButton to AddPersonView
Now head back to AddPersonView.swift. There are two ways you can use ScanButton here.
One way is to display the button next to the text field.
Replace the Name TextField with this HStack:
HStack {
  TextField("Name", text: $name)
  ScanButton(text: $name)
    .frame(width: 100, height: 56, alignment: .leading)
}
You pass a binding to name, set the button’s width and height, and make sure the action’s image is at the leading edge of the button’s frame.
Refresh the preview to see your button:
Scan Text button next to text field

Scan Text button next to text field
Another way to display the button is in the keyboard toolbar.
Add this modifier to the Birthday TextField:
.toolbar {
  ToolbarItemGroup(placement: .keyboard) {
    Spacer()
    ScanButton(text: $birthday)
  }
}
This time, you pass a binding to birthday. The toolbar constrains the button’s frame, and you insert Spacer() to push the button to the toolbar’s trailing edge.
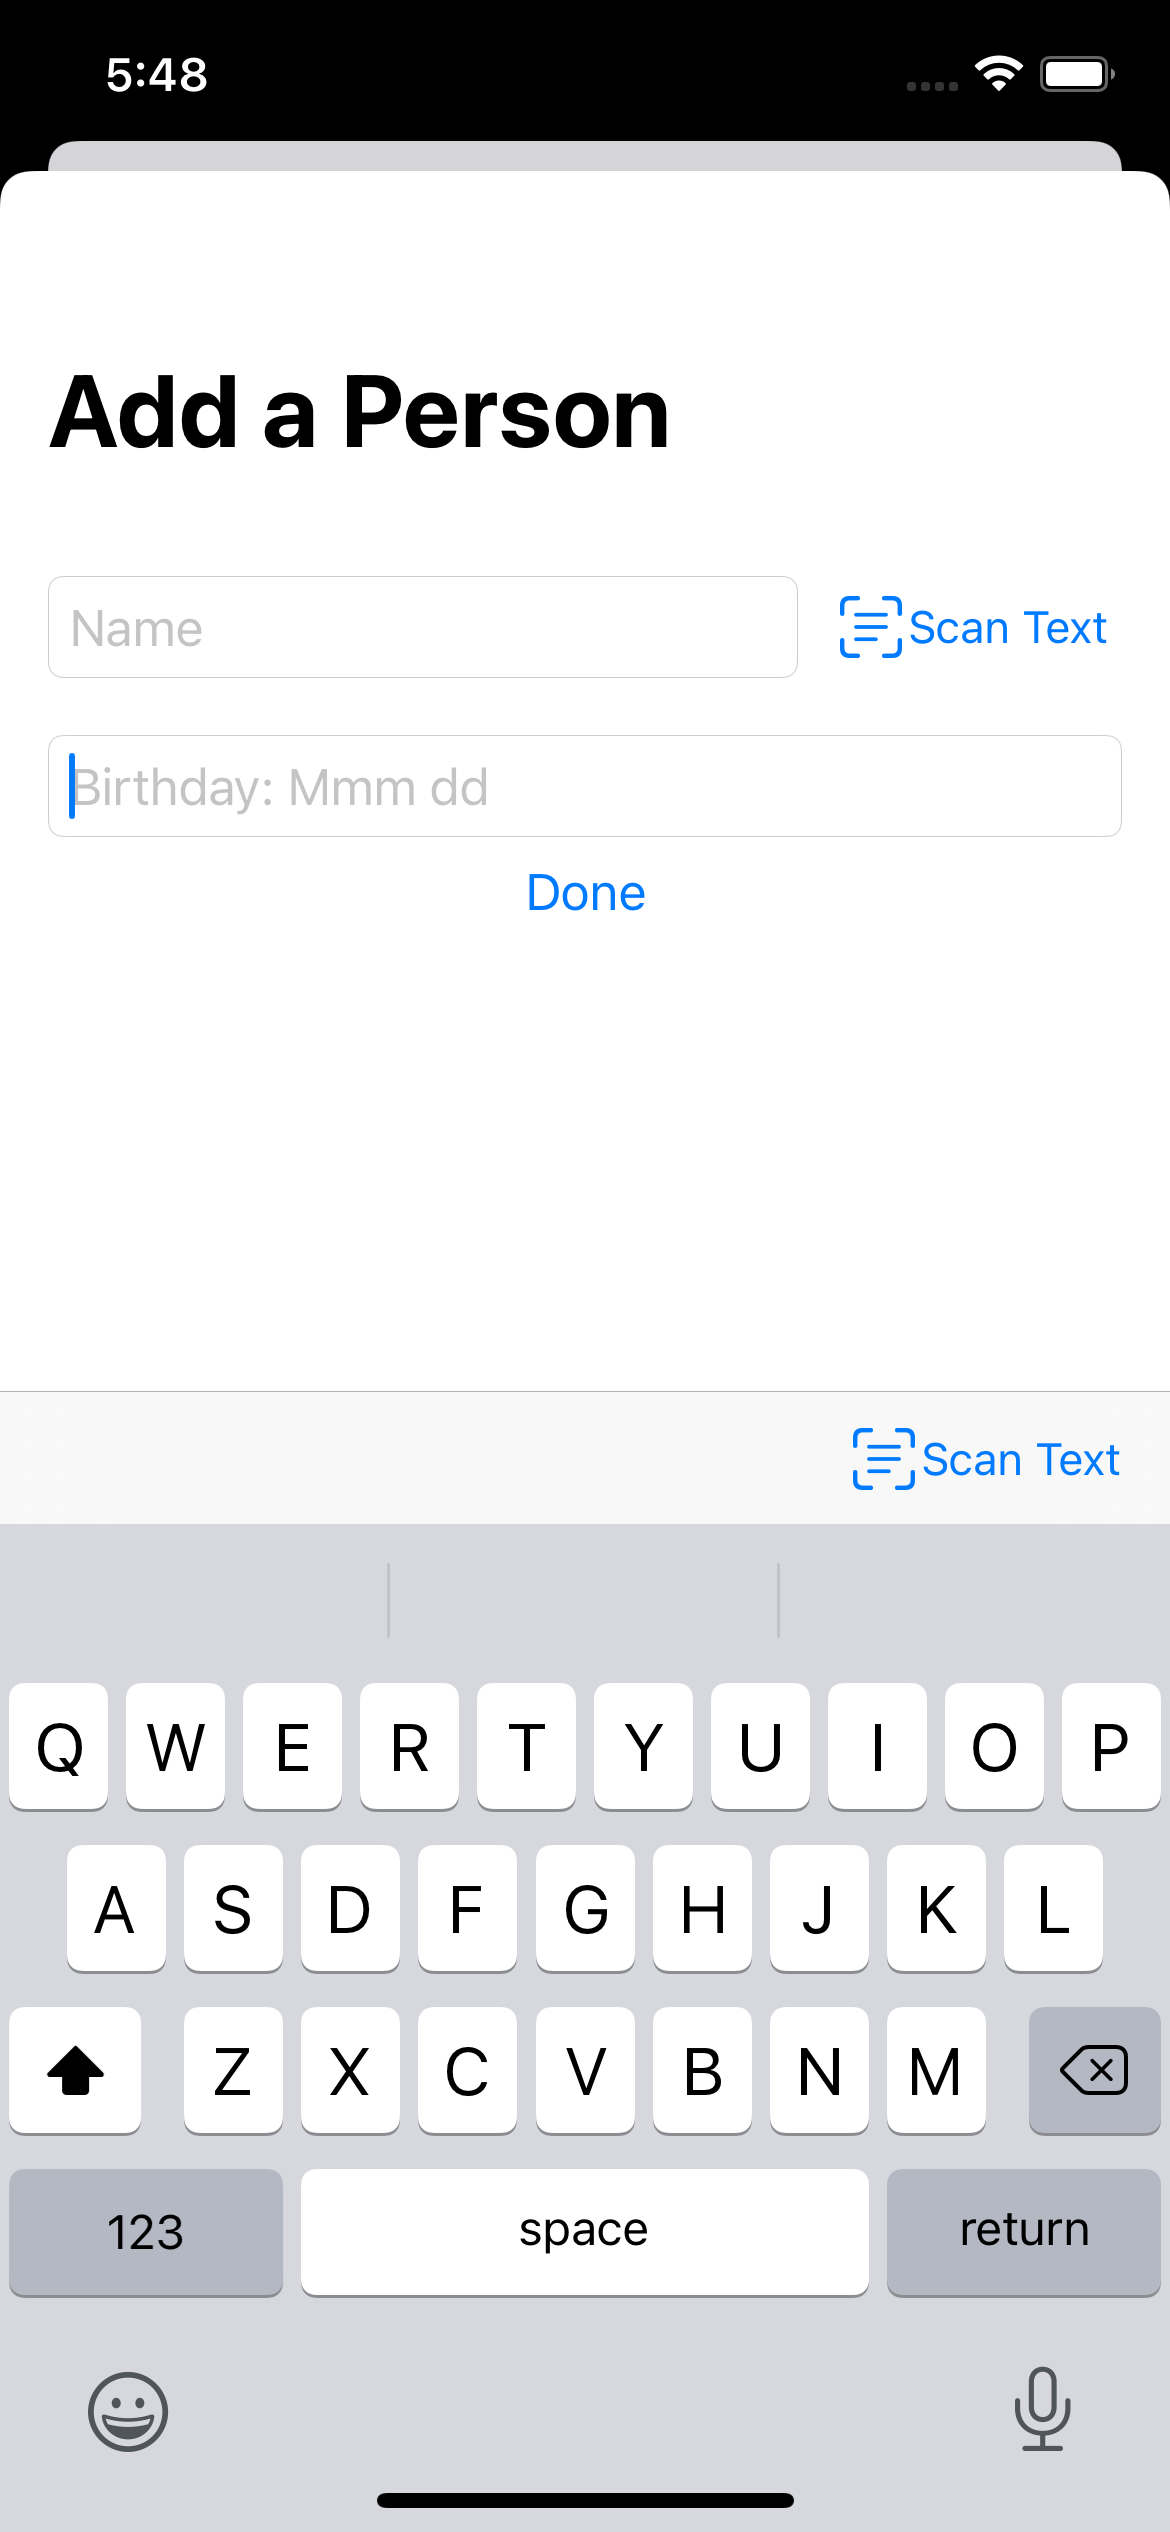
Run Live Preview, then tap in the Birthday text field to see your button in the keyboard toolbar:
Scan Text button in keyboard toolbar
Scan Text button in keyboard toolbar
Now, turn off Live Preview and run the app on your device to try out both buttons.
Using Scan Text buttons

Using Scan Text buttons
Your ScanButton doesn’t behave exactly like the built-in scan button. Text detected by the camera doesn’t immediately appear in the text field. Also, the Birthday Scan Text button ignores the text field’s text content type setting. At least, this happens with the RC versions of Xcode 13 and iOS 15. You might see better results in a later Xcode/iOS version.
Double-tapping in the Birthday text field, then using the built-in scan button, still filters for date text.
Scan Text Into Title
ScanButton helps your users know about this input option, but it’s not really necessary. Once users know about camera input, they’ll expect to use it with any text field or text view. And this just works, with no help required from you.
What if you want to scan text into something like a label? No problem, ScanButton doesn’t care where it inserts captured text: Simply give it a String variable to insert text into, then the calling view can use this String value anywhere it wants.
For example, you can use scanned text to change the navigation title of AddPersonView.
In ScanButton, add this @Binding:
@Binding var title: String
In insertText(_:), add this line:
parent.title = "Add \(text)"
And in previews, replace ScanButton(text:) with this:
ScanButton(text: .constant(""), title: .constant(""))
Now, AddPersonView.swift is complaining about the missing argument for parameter title.
Add this @State property to AddPersonView:
@State private var title = "Add a Person"
In the Name text field’s HStack, replace ScanButton(text:) with this line:
ScanButton(text: $name, title: $title)
In the Birthday text field’s toolbar, replace ScanButton(text:) with this line:
ScanButton(text: $birthday, title: .constant(title))
You don’t want the birthday text to affect the view’s navigation title.
Finally, change .navigationTitle("Add a Person") to this:
.navigationTitle(title)
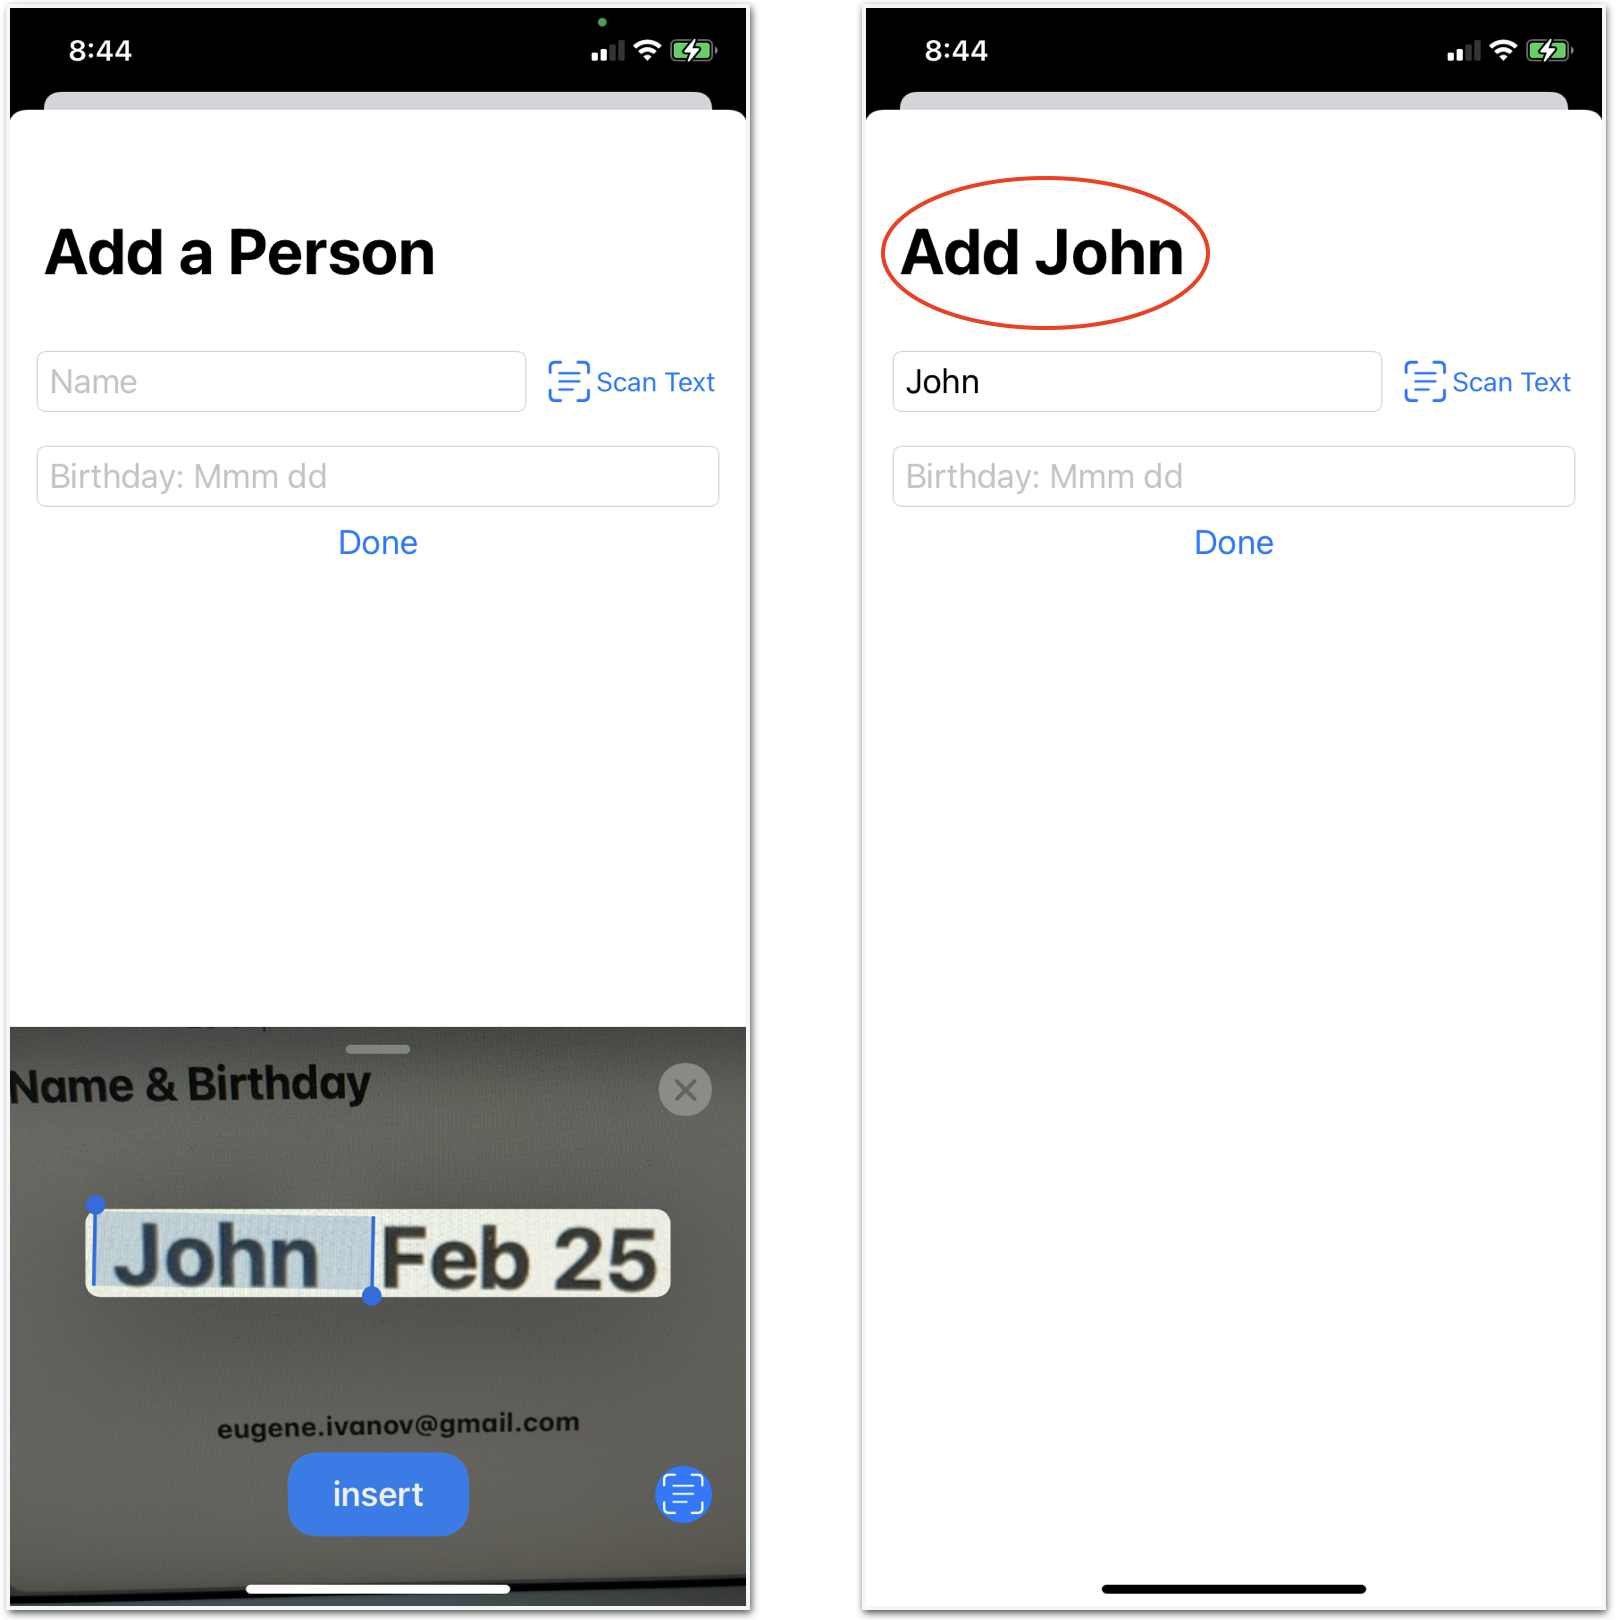
Build and run on your phone, tap the + button, then tap the Scan Text button next to the Name text field. Scan in a name and insert it.
The navigation title changes to match the inserted name:
Scanned text in navigation bar title
Scanned text in navigation bar title
This only works with your Scan Text button. Double-tapping in the Name text field, then using that scan button, won’t change the title.
Also check that scanning text into the Birthday text field doesn’t affect the navigation title.
Button Menu
If you want the Scan Text option to appear in a button menu, or you just want the scan button to have a smaller footprint, change the way you create ScanButton.
Modify makeUIView(context:) in ScanButton: Comment out the button declaration and add this code instead:
let button = UIButton()
button.setImage(
  UIImage(systemName: "camera.badge.ellipsis"),
  for: .normal)
button.menu = UIMenu(children: [textFromCamera])
You set the button image to a small SF Symbol and add the textFromCamera action to the button’s menu.
In AddPersonView.swift, change the Name text field’s ScanButton width to 56 (or less):
ScanButton(text: $name, title: $title)
  .frame(width: 56, height: 56, alignment: .leading)
Check this out in Live Preview, Simulator or on your device. Now, a long press shows the Scan Text option.
Scan Text as a menu option

Scan Text as a menu option
Where To Go From Here?
Download the final project using the Download Materials button at the top or bottom of the tutorial.
In this tutorial, you practiced using Live Text in Photos and used the built-in scan-text function to get text input from your phone’s camera. Then, you specified the textContentType of a text field to make the Vision model filter camera input for text in that format.
To make the camera input feature more visible to your users, you created a UIViewRepresentable button to launch captureTextFromCamera(responder:identifier:). For text fields and text views, this provides functionality similar to the built-in scan-text button. You easily extended your button to scan text into a non-editable view. Finally, you modified your button to have a menu with scan-text as one of its items.