Getting Started With the BLoC Pattern
See how to use the popular BLoC pattern to build your Flutter app architecture and manage the flow of data through your widgets using Dart streams. By Sardor Islomov.
Sign up/Sign in
With a free Kodeco account you can download source code, track your progress, bookmark, personalise your learner profile and more!
Create accountAlready a member of Kodeco? Sign in
Sign up/Sign in
With a free Kodeco account you can download source code, track your progress, bookmark, personalise your learner profile and more!
Create accountAlready a member of Kodeco? Sign in
Contents
Getting Started With the BLoC Pattern
25 mins
The Touch of RxDart
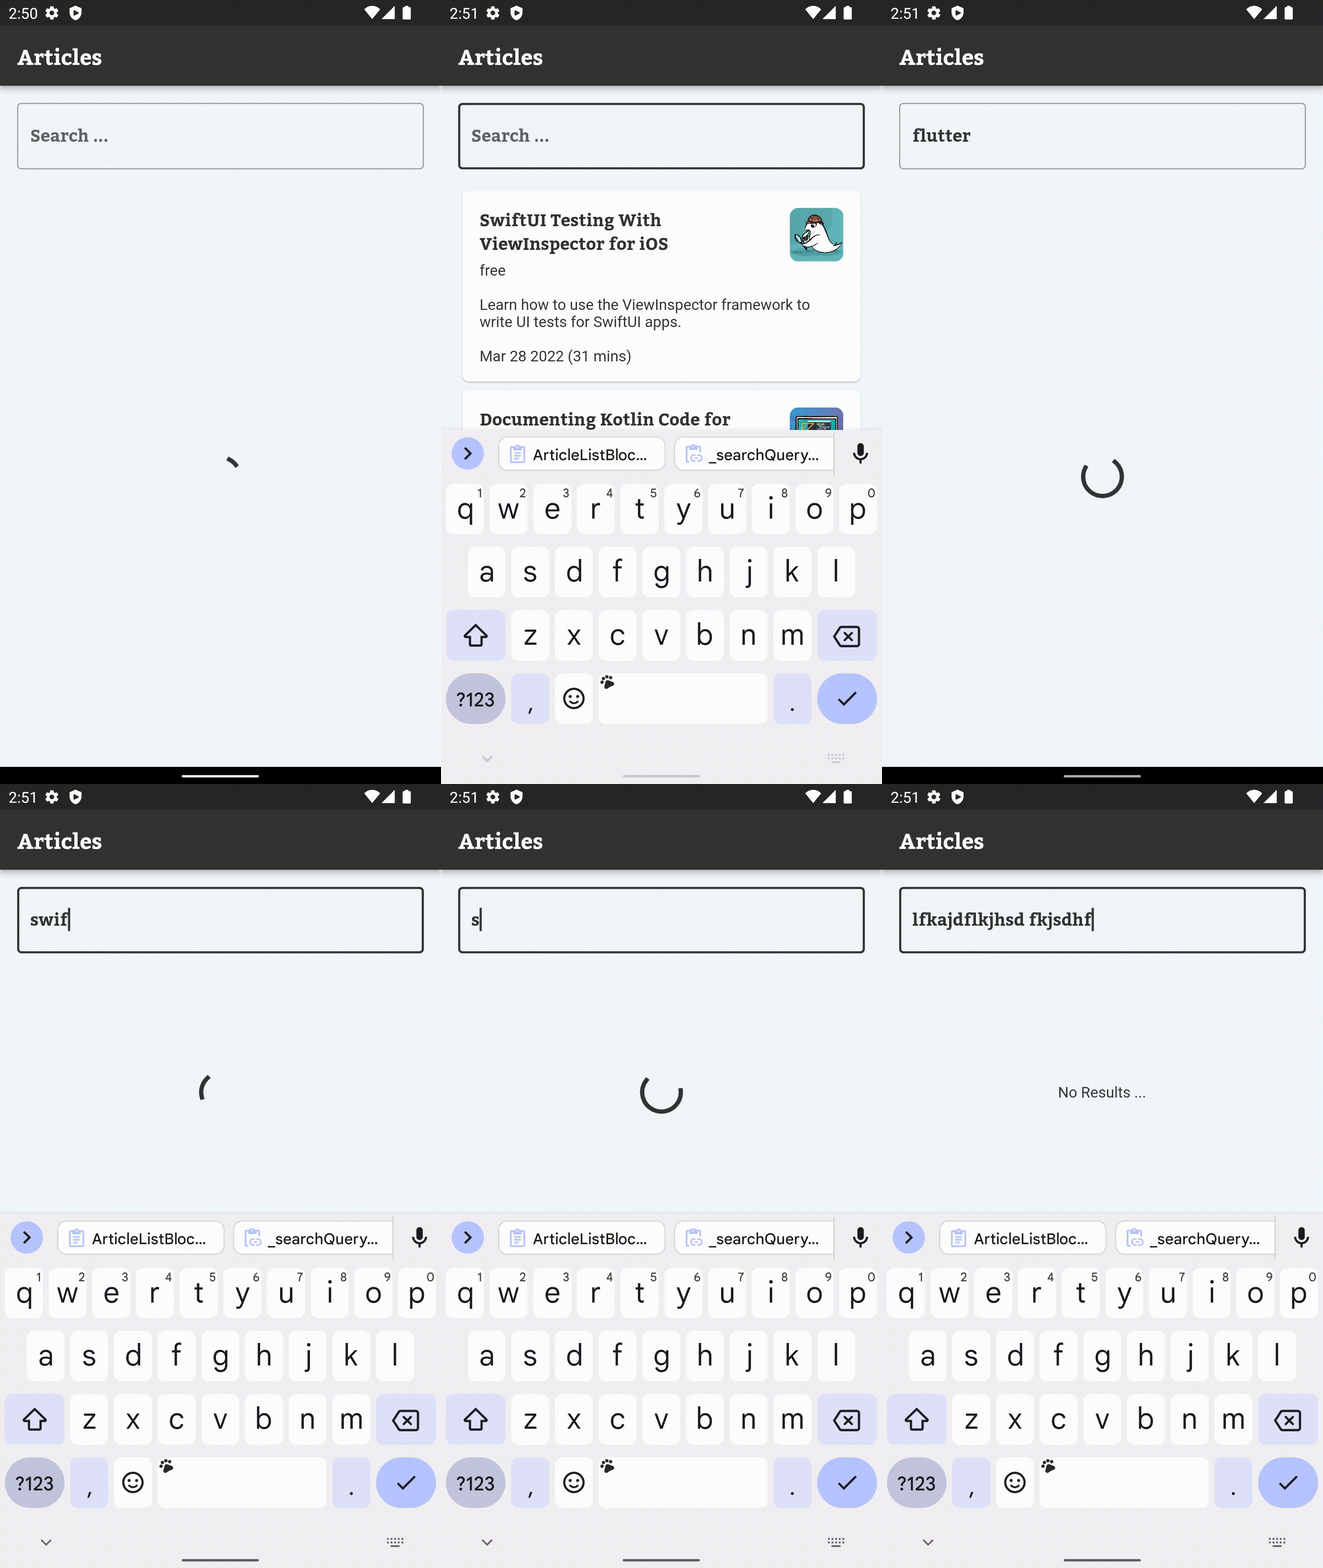
At this moment, you can search articles and see results. But there are a few UX and performance issues you can solve:
-
ArticleListBlocsends a network request every time you change the search field character by character. Usually, users want to enter a reasonable query and see results for it. To solve this problem, you’ll debounce the input events and send a request when the user completes their query. Debouncing means the app skips input events that come in short intervals. - When you finish entering your query, you might think the screen is stuck because you don’t see any UI feedback. To improve the user experience, show the user the app is loading and isn’t stuck.
-
asyncMapwaits for request completion, so the user sees all entered query responses one by one. Usually, you have to ignore the previous request result to process a new query.
The main purpose of BLoC is to model Business Logic components. Thanks to this, you can solve the previous issues by editing BLoC code only without editing widgets at all on the UI layer.
Go to bloc/article_list_bloc.dart and add import 'package:rxdart/rxdart.dart'; at the top of the file. rxdart packages are already added in pubspec.yaml.
Replace ArticleListBloc() with the following:
ArticleListBloc() {
  articlesStream = _searchQueryController.stream
      .startWith(null) // 1
      .debounceTime(const Duration(milliseconds: 100)) // 2
      .switchMap( // 3
        (query) => _client.fetchArticles(query)
            .asStream() // 4
            .startWith(null), // 5
      );
}
The code above changes the output stream of articles in the following way:
-
startWith(null)produces an empty query to start loading all articles. If the user opens the search for the first time and doesn’t enter any query, they see a list of recent articles. -
debounceTimeskips queries that come in intervals of less than 100 milliseconds. When the user enters characters,TextFieldsends multipleonChanged{}events. debounce skips most of them and returns the last keyword event.Note: Read more about the debounce operator at ReactiveX – debounce documentation - Replace
asyncMapwithswitchMap. These operators are similar, butswitchMapallows you to work with other streams. - Convert
FuturetoStream. -
startWith(null)at this line sends anullevent to the article output at the start of every fetch request. So when the user completes the search query, UI erases the previous list of articles and shows the widget’s loading. It happens because_buildResultsin article_list_screen.dart listens to your stream and displays a loading indicator in the case ofnulldata.
Build and run the app. The app is more responsive. You see a loading indicator and only the latest entered requests.
Final Screen and BLoC
The second screen of the app shows a detail of the article. It also has its own BLoC objects to manage the state.
Create a file called article_detail_bloc.dart in the bloc folder with the following code:
class ArticleDetailBloc implements Bloc {
  final String id;
  final _refreshController = StreamController<void>();
  final _client = RWClient();

  late Stream<Article?> articleStream;

  ArticleDetailBloc({
    required this.id,
  }) {
    articleStream = _refreshController.stream
        .startWith({})
        .mapTo(id)
        .switchMap(
          (id) => _client.getDetailArticle(id).asStream(),
    )
    .asBroadcastStream();
  }

  @override
  void dispose() {
    _refreshController.close();
  }
}
This code is very similar to ArticleListBloc. The difference is the API and the data type that’s returned. You’ll add refresh later to see another way to send input events. You need asBroadcastStream() here to allow multiple stream subscriptions for the refresh functionality.
Now, create an article_detail_screen.dart file with an ArticleDetailScreen class in the UI folder to put the new BLoC to use.
class ArticleDetailScreen extends StatelessWidget {
  const ArticleDetailScreen({Key? key}) : super(key: key);

  @override
  Widget build(BuildContext context) {
    // 1
    final bloc = BlocProvider.of<ArticleDetailBloc>(context);
    return Scaffold(
      appBar: AppBar(
        title: const Text('Articles detail'),
      ),
      body: Container(
        alignment: Alignment.center,
        // 2
        child: _buildContent(bloc),
      ),
    );
  }

  Widget _buildContent(ArticleDetailBloc bloc) {
    return StreamBuilder<Article?>(
      stream: bloc.articleStream,
      builder: (context, snapshot) {
        final article = snapshot.data;
        if (article == null) {
          return const Center(child: CircularProgressIndicator());
        }
        // 3
        return ArticleDetail(article);
      },
    );
  }
}
ArticleDetailScreen does the following:
- Fetches the
ArticleDetailBlocinstance. - The
body:property displays the content with data received fromArticleDetailBloc. - Displays details using prepared widget
ArticleDetail.
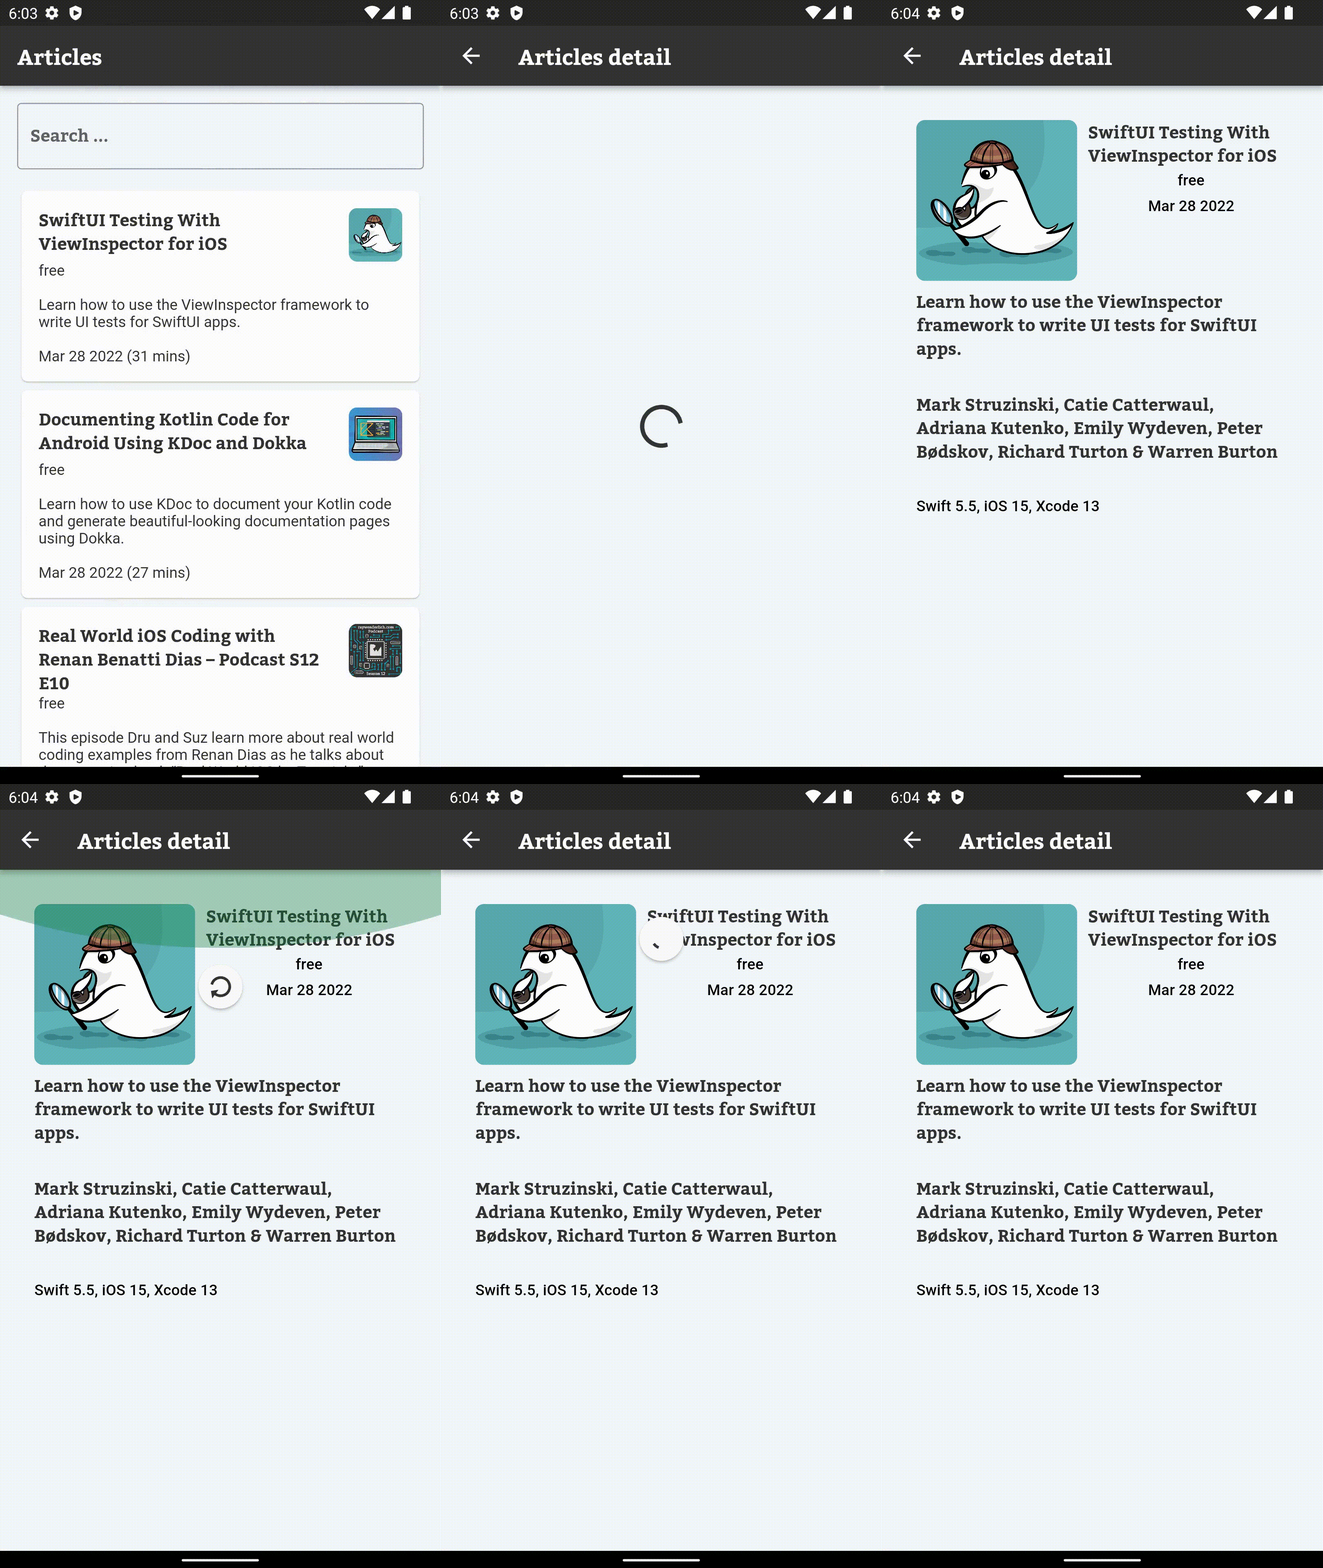
Build and run the app. After seeing an article list, tap one of them.
It doesn’t navigate to ArticleDetailScreen.
That’s because you didn’t add navigation from ArticleListScreen to ArticleDetailScreen. Go to article_list_screen.dart and replace the code of the onTap{} property in _buildSearchResults() with the following:
onTap: () {
  Navigator.push(
    context,
    MaterialPageRoute(
      builder: (context) => BlocProvider(
        bloc: ArticleDetailBloc(id: article.id),
        child: const ArticleDetailScreen(),
      ),
    ),
  );
},
Build and run the app, then tap the article. It displays a detail screen of the selected article.
Next, you’ll implement the missing bit to refresh the content to fetch the latest updates or reload after a network error.
Replace body:property in article_detail_screen.dart with following code:
...
// 1
body: RefreshIndicator(
  // 2
  onRefresh: bloc.refresh,
  child: Container(
    alignment: Alignment.center,
    child: _buildContent(bloc),
  ),
),
...
Here’s a breakdown:
- The
RefreshIndicatorwidget allows use of the swipe-to-refresh gesture and invokesonRefreshmethod. -
onRefreshmay use BLoC sinkbloc.refresh.add, but there’s a problem.onRefreshneeds to get someFutureback to know when to hide the loading indicator. To provide this, you’ll create a new BLoC methodFuture refresh()to supportRefreshIndicatorfunctionality.
Add a new method, Future refresh(), to article_detail_bloc.dart:
Future refresh() {
  final future = articleStream.first;
  _refreshController.sink.add({});
  return future;
}
The code above solves two cases: requesting an update and returning Future for RefreshIndicator. It:
- Sends a new refresh event to sink so
ArticleDetailBlocwill refresh the article data. - The operator
firstof theStreaminstance returnsFuture, which completes when any article is available in the stream at the time of this call. It helps to wait when the article update is available to render. - Do you remember the
asBroadcastStream()call before? It’s required because of this line.firstcreates another subscription toarticleStream.
refresh is called at the same time an API fetch is in progress. Returned Future completes early, then the new update comes to articleStream and RefreshIndicator hides itself before the final update. It’s also wrong to send an event to sink and then request the first future. If a refresh event is processed immediately and a new Article comes before the call of first, the user sees infinity loading.Build and run the app. It should support the swipe-to-refresh gesture.
Looks elegant! Now, users of raywenderlich.com can view and search their favorite articles from the app.


