
CompositionLocal in Jetpack Compose
Learn about CompositionLocal in Jetpack Compose and implement an efficient way for multiple composables to access data. By Rodrigo Guerrero.
Jetpack Compose lets you create UIs for your app using Kotlin. It works by passing data to each UI component — aka composable — to display its state.
But when you have several composables in your UI that use the same data or classes, passing them down can quickly result in messy and complicated code.
That’s why Android provides CompositionLocal. It helps you provide classes to a set of composables implicitly, so your code can be simpler and less complicated.
In this tutorial, you’ll enhance the UI of a reading list app and learn all about:
- How Jetpack Compose architecture works.
- What CompositionLocal is and its different types.
- Predefined CompositionLocals available to you.
- How to create your own CompositionLocal.
- When to use CompositionLocal.
- Alternatives to CompositionLocal.
Getting Started
Download the project app by clicking Download Materials at the top or bottom of this tutorial. Open Android Studio Chimpmunk or later and import the starter project.
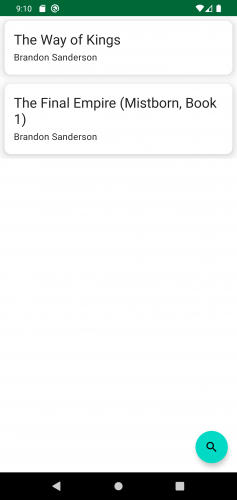
You’ll build an app called ToReadList, which lets you search for books and add them to a reading list.
Below is a summary of what each package contains:
- di: Classes for providing dependency injection.
- models: Model definitions used in the app.
- network: Classes related to the connection with the API.
- repositories: Repository-related code.
- storage: Classes that handle the local storage.
- ui: Composables and theme definition.
-
viewmodels:
ViewModelclasses.
This sample app uses the OpenLibrary API. You don’t have to do any initial configuration because OpenLibrary doesn’t require an API key. Learn more about OpenLibrary on openlibrary.org.
Build and run the app. You’ll see an empty screen with a search floating action button:

If you press the search FAB you’ll notice that it doesn’t work, which is intentional.
You wanted to learn about CompositionLocal, right? Great! You’ll build out the missing functionality in this tutorial.
Introduction to Jetpack Compose Architecture
The days when you had to deal with the old View system to create UIs for your Android apps are thankfully in the past. With Jetpack Compose, you can create UIs using Kotlin — it’s faster and easier.
However, the way Jetpack Compose works is completely different than how it worked with Views.
For example, once the UI finishes displaying on the screen, there is no way to update it in Compose. Instead, you update the UI state.
Once you set the new state, a recomposition — the process that recreates the UI with the new state – takes place.
Recomposition is efficient and focused. It only recreates UI components that have a different state and preserves the components that don’t need to change.
But how can a composable know about its state and its changes? This is where unidirectional data flow comes into play.
Understanding Unidirectional Data Flow
Unidirectional data flow is the pattern that Jetpack Compose uses to propagate state to the different UI composables. It says that the state flows down to the composables and events flow up.
In other words, the state passes from one composable to another until it reaches the innermost composable.
On the other hand, each composable notifies its caller whenever an event takes place. Events include things like clicking a button or updating the content on an edit text field.

Implementing Unidirectional Data Flow
At present, the FAB composable doesn’t know about the navigation controller, so it can’t perform navigation to the search screen. You’ll add functionality to the search Floating Action Button (FAB) so that you can learn how unidirectional data flow works.
Open MainActivity.kt, the class where the UI tree begins. It also contains the definition for navController. You need to pass down navController so that it reaches the search FAB.
Update the call to BookListScreen() as follows:
BookListScreen(books, navController)
That’s how you pass the navController down to the BookListScreen. However, the method call will show a compiler error because the parameter is missing from the function definition. You’ll fix that next.
Open BookListScreen.kt then update the composable parameters as follows:
@Composable
fun BookListScreen(
  books: List<Book>,
  navController: NavHostController
)
You might see the NavHostController in red — that will vanish once you import the necessary class with this:
import androidx.navigation.NavHostController
BookListScreen() now is able to receive the navController. Finally, update the FloatingActionButton onClick, like this:
FloatingActionButton(onClick = { navController.navigate("search") }) {
  Icon(
    imageVector = Icons.Filled.Search,
    contentDescription = "Search"
  )
}
This code makes it so that when you press the FloatingActionButton, you navigate to the search screen.
Build and run. Tap the search FAB to navigate to the search screen, like this:

Search for any book or author you like to see a list of results:

Now you’re able to search for books and add them to your to-read list. Tap a few Add to List buttons to add some books to your reading list.
For now, you won’t get any feedback to confirm you’ve added a book to your list, but you’ll add that feature later.
Navigate back to see all the reading you need to do:
Great job, the basic functions are working now!
But the design is a bit off for the book elements — you get no confirmation after adding a book and there are no images. How can you judge a book by its cover when it doesn’t even have one?
Fortunately, you have data that every composable can use, such as context, navController and styles. You’ll add these UX-improving features in the following sections.
Getting to Know CompositionLocal
As you saw in the previous section, data flows down through the different composables — each parent passes down the necessary data to their children. So each composable knows explicitly which dependencies it needs.
This is particularly useful for data used by a specific composable that isn’t used elsewhere.
There are times when you want to use data in multiple composables along the UI tree. If you follow the idea that data flows down, then you would need to pass the same data along all composables, which may become inconvenient.
With CompositionLocal, you can create objects that are available throughout the UI tree or just a subset of it. You don’t need to pass down the data along all composables, so your data is implicitly available for the composables to use.
You can also change the values of a CompositionLocal to be different for a subset of the UI tree, making that implementation available only to the descendants in that subtree. The other nodes will not be affected.
Below is a diagram that represents the UI tree. Here’s an explanation of it:
- The red section is a
CompositionLocalimplementation. - The blue section represents a different implementation for the same
CompositionLocal. - Each implementation is only available to the composables in the subtree where you defined each implementation.

You can create your own CompositionLocal but don’t have to. Android and Jetpack provide you with several options.