Vision Tutorial for iOS: Detect Body and Hand Pose
Learn how to detect the number of fingers shown to the camera with help from the Vision framework. By Saeed Taheri.
Detecting Hands
To use any algorithm in Vision, you generally follow these three steps:
-
Request: You request the framework detect something for you by defining request characteristics. You use an appropriate subclass of
VNRequest. - Handler: Next, you ask the framework to perform a method after the request finishes executing or handling the request.
-
Observation: Finally, you get potential results or observations back. These observations are instances of
VNObservationbased on the request you made.
You’ll deal with the request first.
Request
The request for detecting hands is of type VNDetectHumanHandPoseRequest.
Still in CameraViewController.swift, add the following after import AVFoundation to access the Vision framework:
import Vision
Then, inside the class definition, create this instance property:
private let handPoseRequest: VNDetectHumanHandPoseRequest = {
  // 1
  let request = VNDetectHumanHandPoseRequest()

  // 2
  request.maximumHandCount = 2
  return request
}()
Here you:
- Create a request for detecting human hands.
- Set the maximum number of hands to detect to two. Vision framework is powerful. It can detect many hands in an image. Since a maximum of ten stars falls in any single drop, two hands with ten fingers will suffice.
Now, it’s time to set up the handler and observation.
Handler and Observation
You can use AVCaptureVideoDataOutputSampleBufferDelegate to get a sample out of the capture stream and start the detection process.
Implement this method in CameraViewController‘s extension, which you created earlier:
func captureOutput(
  _ output: AVCaptureOutput,
  didOutput sampleBuffer: CMSampleBuffer,
  from connection: AVCaptureConnection
) {
  // 1
  let handler = VNImageRequestHandler(
    cmSampleBuffer: sampleBuffer,
    orientation: .up,
    options: [:]
  )

  do {
    // 2
    try handler.perform([handPoseRequest])

    // 3
    guard
      let results = handPoseRequest.results?.prefix(2),
      !results.isEmpty
    else {
      return
    }

    print(results)
  } catch {
    // 4
    cameraFeedSession?.stopRunning()
  }
}
Here’s a code breakdown:
Performing requests is a synchronous operation. Remember the dispatch queue you provided to the delegate callback? That ensures you don’t block the main queue.
Vision completes the detection process on that background queue.
-
captureOutput(_:didOutput:from:)is called whenever a sample is available. In this method, you create a handler, which is the second step needed to use Vision. You pass the sample buffer you get as an input parameter to perform the request on a single image. - Then, you perform the request. If there are any errors, this method throws them, so it’s in a do-catch block.
Performing requests is a synchronous operation. Remember the dispatch queue you provided to the delegate callback? That ensures you don’t block the main queue.
Vision completes the detection process on that background queue.
- You get the detection results, or observations, using the request’s
results. Here you get the first two items and make sure the results array isn’t empty. As you only asked for two hands when creating the request, this is an extra precaution to ensure you don’t get more than two result items.
Next, you print the results to the console. - If the request fails, it means something bad happened. In a production environment, you would handle this error better. For now, you can stop the camera session.
Build and run. Put your hands in front of the camera and check out the Xcode console.

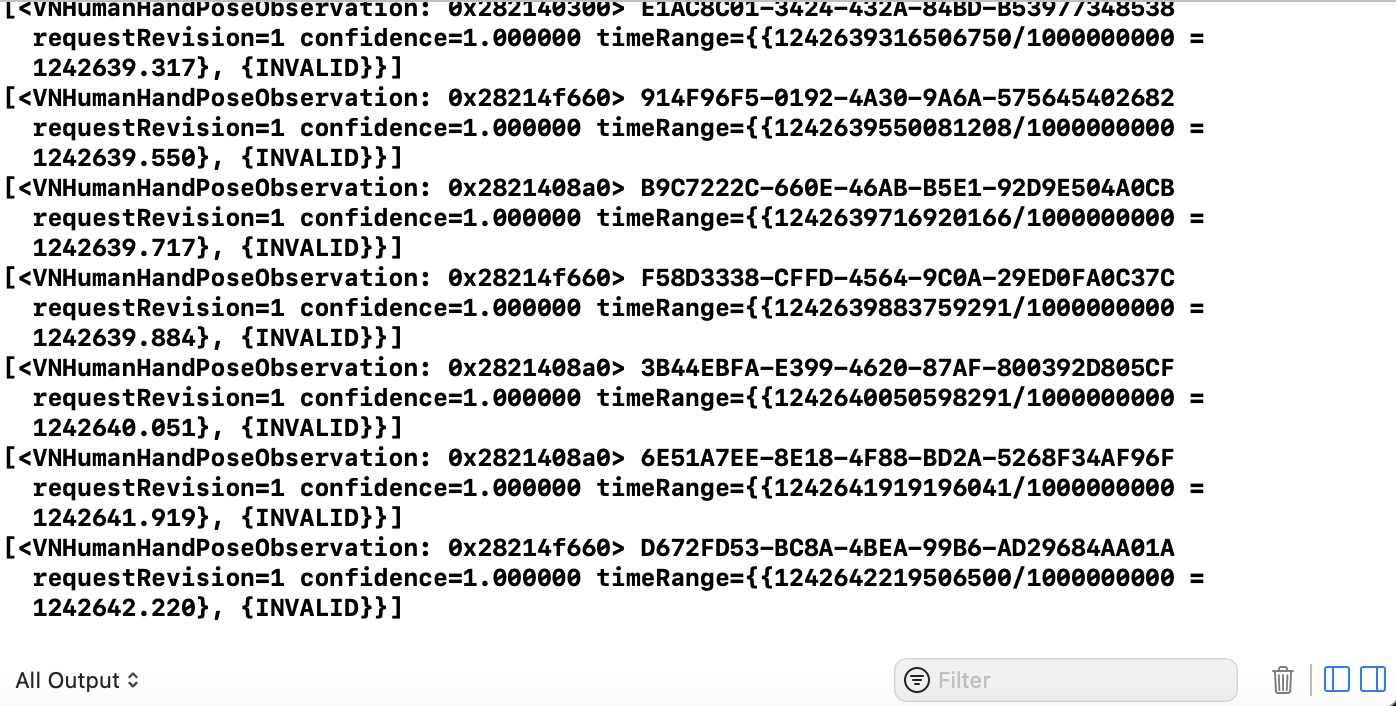
In the console, you see the observation objects of type VNHumanHandPoseObservation are visible. Next, you’ll extract finger data from these observations. But first, you need to read up on anatomy!

Anatomy to the Rescue!
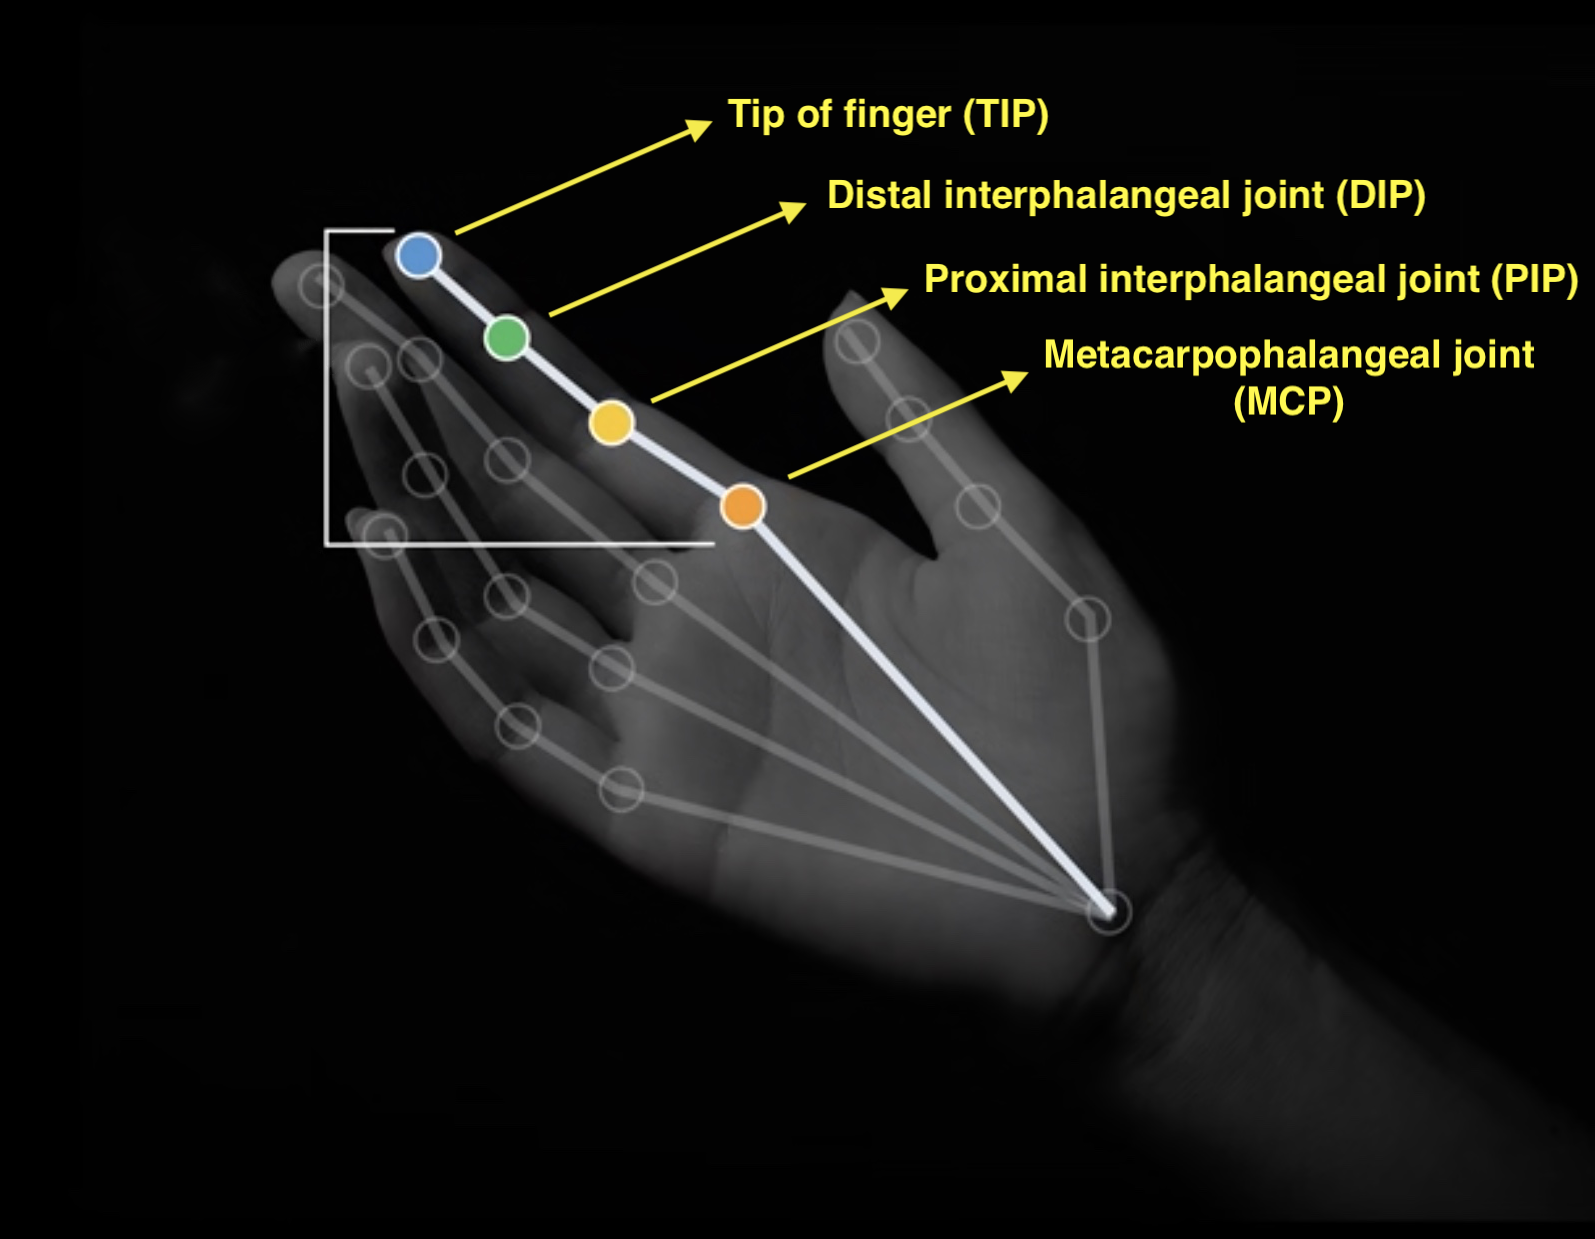
Vision framework detects hands in a detailed manner. Check out this illustration:

Each of the circles on this image is a Landmark. Vision can detect a total of 21 landmarks for each hand: four for each finger, four for the thumb and one for the wrist.
Each of these fingers is in a Joints Group, depicted by the API in VNHumanHandPoseObservation.JointsGroupName as:
.thumb.indexFinger.middleFinger.ringFinger.littleFinger
In each joints group, every individual joint has a name:
- TIP: The tip of the finger.
- DIP: Distal interphalangeal joint or the first joint after the finger tip.
- PIP: Proximal interphalangeal joint or the middle joint.
- MIP: The metacarpophalangeal joint is at the bottom of the finger where it joins the palm.
The thumb is a bit different. It has a TIP, but the other joints have different names:
- TIP: The tip of the thumb.
- IP: Interphalangeal joint to the first joint after the tip of the thumb.
- MP: The metacarpophalangeal joint is at the bottom of the thumb where it joins the palm.
- CMC: The carpometacarpal joint is near the wrist.

Many developers don’t think they need math in their careers. Who would’ve thought anatomy would be a prerequisite, too?
With anatomy covered, it’s time to detect fingertips.
Detecting Fingertips
To make things simple, you’ll detect fingertips and draw an overlay on top.
In CameraViewController.swift, add the following to the top of captureOutput(_:didOutput:from:):
var fingerTips: [CGPoint] = []
This will store the detected fingertips. Now replace print(results), which you added in an earlier step, with:
var recognizedPoints: [VNRecognizedPoint] = []

try results.forEach { observation in
  // 1
  let fingers = try observation.recognizedPoints(.all)

  // 2
  if let thumbTipPoint = fingers[.thumbTip] {
    recognizedPoints.append(thumbTipPoint)
  }
  if let indexTipPoint = fingers[.indexTip] {
    recognizedPoints.append(indexTipPoint)
  }
  if let middleTipPoint = fingers[.middleTip] {
    recognizedPoints.append(middleTipPoint)
  }
  if let ringTipPoint = fingers[.ringTip] {
    recognizedPoints.append(ringTipPoint)
  }
  if let littleTipPoint = fingers[.littleTip] {
    recognizedPoints.append(littleTipPoint)
  }
}

// 3
fingerTips = recognizedPoints.filter {
  // Ignore low confidence points.
  $0.confidence > 0.9
}
.map {
  // 4
  CGPoint(x: $0.location.x, y: 1 - $0.location.y)
}
Here you:
- Get the points for all fingers.
- Look for tip points.
- Each
VNRecognizedPointhas aconfidence. You only want observations with high confidence levels. - Vision algorithms use a coordinate system with lower left origin and return normalized values relative to the pixel dimension of the input image. AVFoundation coordinates have an upper-left origin, so you convert the y-coordinate.
You need to do something with those finger tips, so add the following to CameraViewController:
// 1
var pointsProcessorHandler: (([CGPoint]) -> Void)?

func processPoints(_ fingerTips: [CGPoint]) {
  // 2
  let convertedPoints = fingerTips.map {
    cameraView.previewLayer.layerPointConverted(fromCaptureDevicePoint: $0)
  }

  // 3
  pointsProcessorHandler?(convertedPoints)
}
Here you:
- Add a property for the closure to run when the framework detects points.
- Convert from AVFoundation relative coordinates to UIKit coordinates so you can draw them on screen. You use
layerPointConverted, which is a method inAVCaptureVideoPreviewLayer. - You call the closure with the converted points.
In captureOutput(_:didOutput:from:), just after you declare the fingerTips property, add:
defer {
  DispatchQueue.main.sync {
    self.processPoints(fingerTips)
  }
}
This will send your finger tips to be processed on the main queue once the method is finished.
Time to show those fingertips to the user!