Getting Started with Core Data and CloudKit
In this tutorial, you’ll learn how to use NSPersistentCloudKitContainer to integrate Core Data and CloudKit. By Saeed Taheri.
Core Data and CloudKit Today
As of iOS 13 and Xcode 11, the Xcode template for Core Data projects has an option to integrate CloudKit as well.

Core Data and CloudKit both have three main elements in their definition: objects, models and stores. In short, models describe objects and stores are where objects are persisted.
Look at the following table:
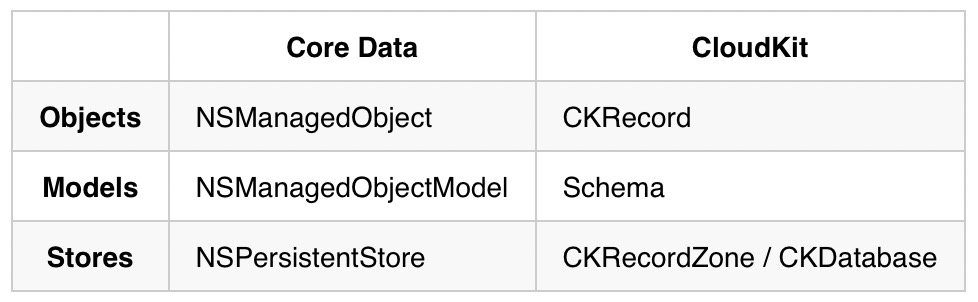
You’re familiar with the items in the Core Data column. In CloudKit nomenclature, you can map the concepts of NSManagedObject into CKRecord, NSManagedObjectModel into Schema and NSPersistentStore into CKRecordZone or CKDatabase.
According to a session in WWDC 2019, Apple engineers wrote thousands of lines of code to encapsulate common patterns used for syncing, scheduling and error recovery to make Core Data work with CloudKit. Fortunately, this time, Apple did a robust job.
Preparing PlaceTag for CloudKit
It’s time to move to the new Core Data CloudKit syncing method.
Setting up the Project
In Project navigator, click the PlaceTag project. Select the PlaceTag target and click the Signing & Capabilities tab item, as indicated by numbers 1 through 3 in the screenshot below.
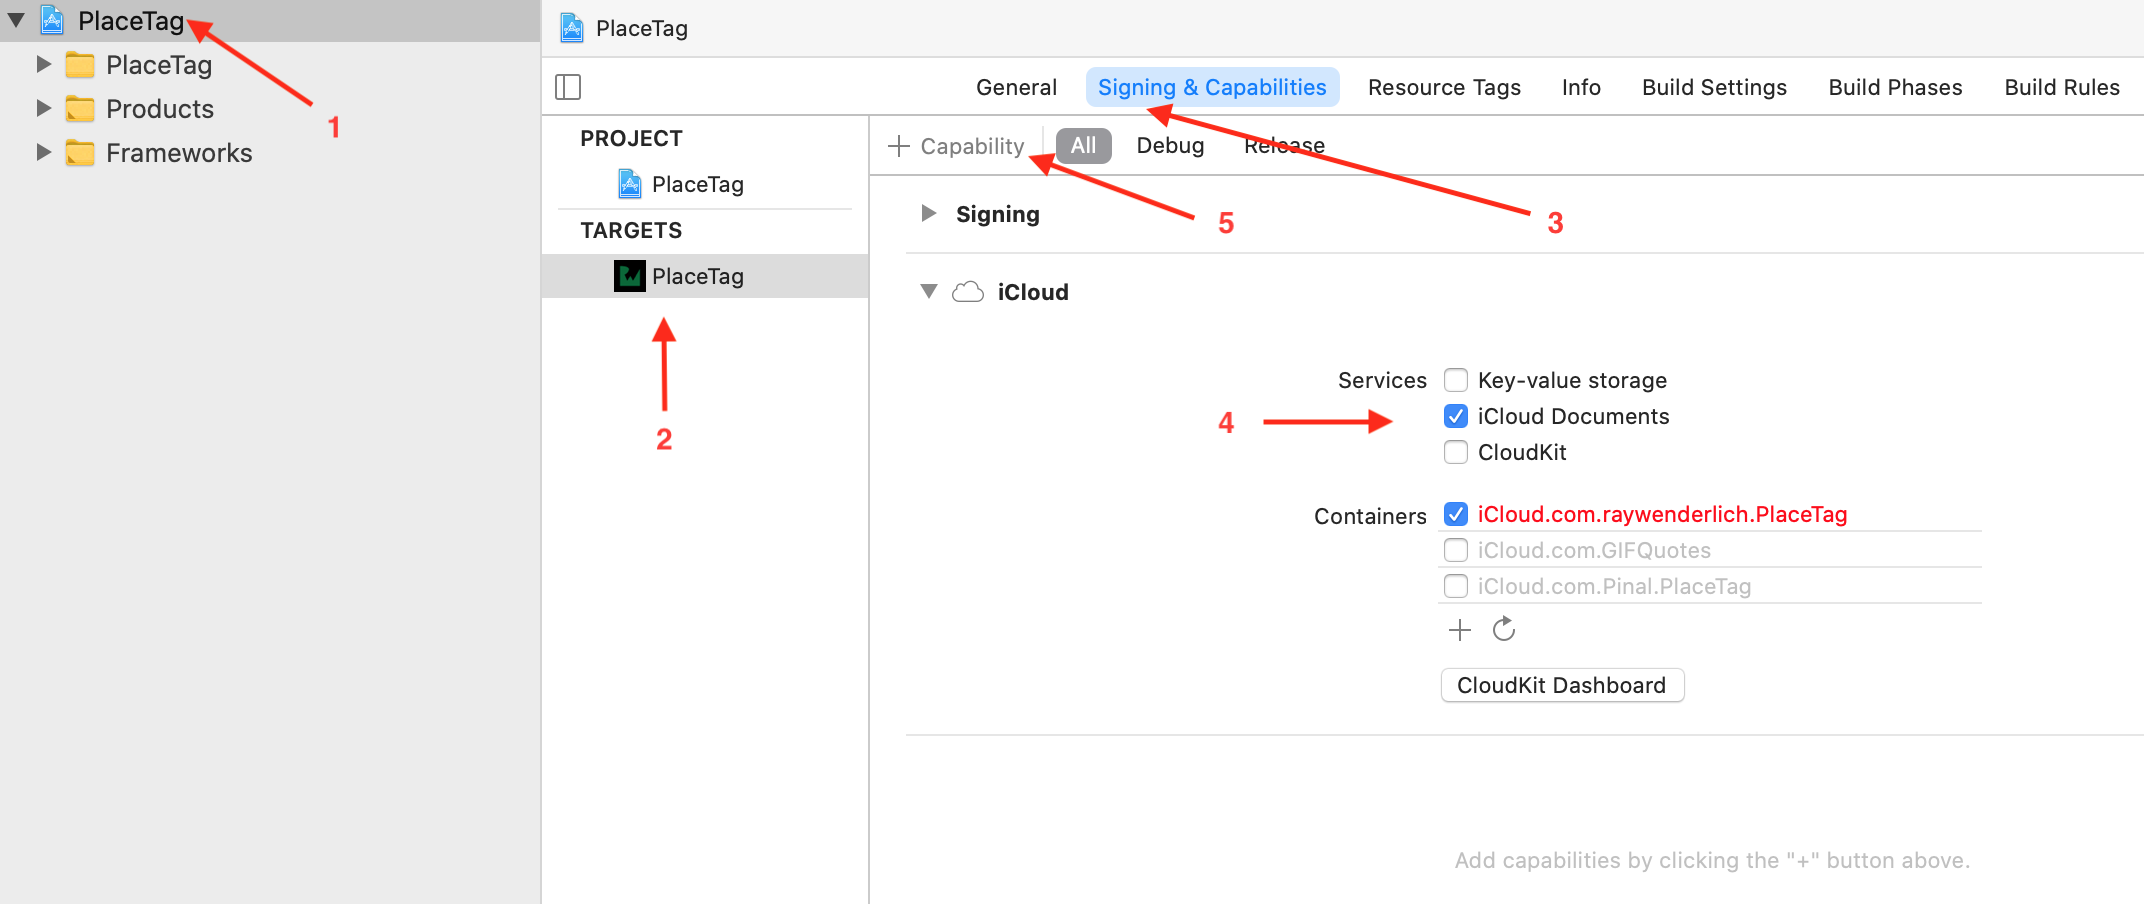
Deselect iCloud Documents and select CloudKit, as number 4 in the screenshot above indicates.
Many apps and users have access to iCloud. However, partitions called containers segregate and encapsulate the data to keep it private.
Apps that are already using CloudKit can’t use Core Data and CloudKit with their existing CloudKit containers. To fully manage all aspects of data mirroring, Core Data owns the CloudKit schema created from the Core Data model. Existing CloudKit containers aren’t compatible with this schema.
With that in mind, you need to create a new container. This value should be unique and start with iCloud. As mentioned before, Apple suggests that it be of the form iCloud.{reverse DNS}.{app name or name for group}. For instance: iCloud.com.yourcompany.yourapp.
It’s worth noting that multiple apps from a company may access a single container.
Unfortunately, Apple doesn’t let you delete containers later, so choose the container name wisely.
After you’ve chosen the name, select the container, if Xcode didn’t select it for you automatically.
Adding Invisible Push Notification Support
Whenever a record changes in the container, CloudKit sends a silent push notification to registered devices.
For this functionality to work, you need to add two capabilities to the app. Click the + button as indicated by number 5 in the image above and add Push Notification, if Xcode didn’t add it for you automatically.

Then add Background Modes.
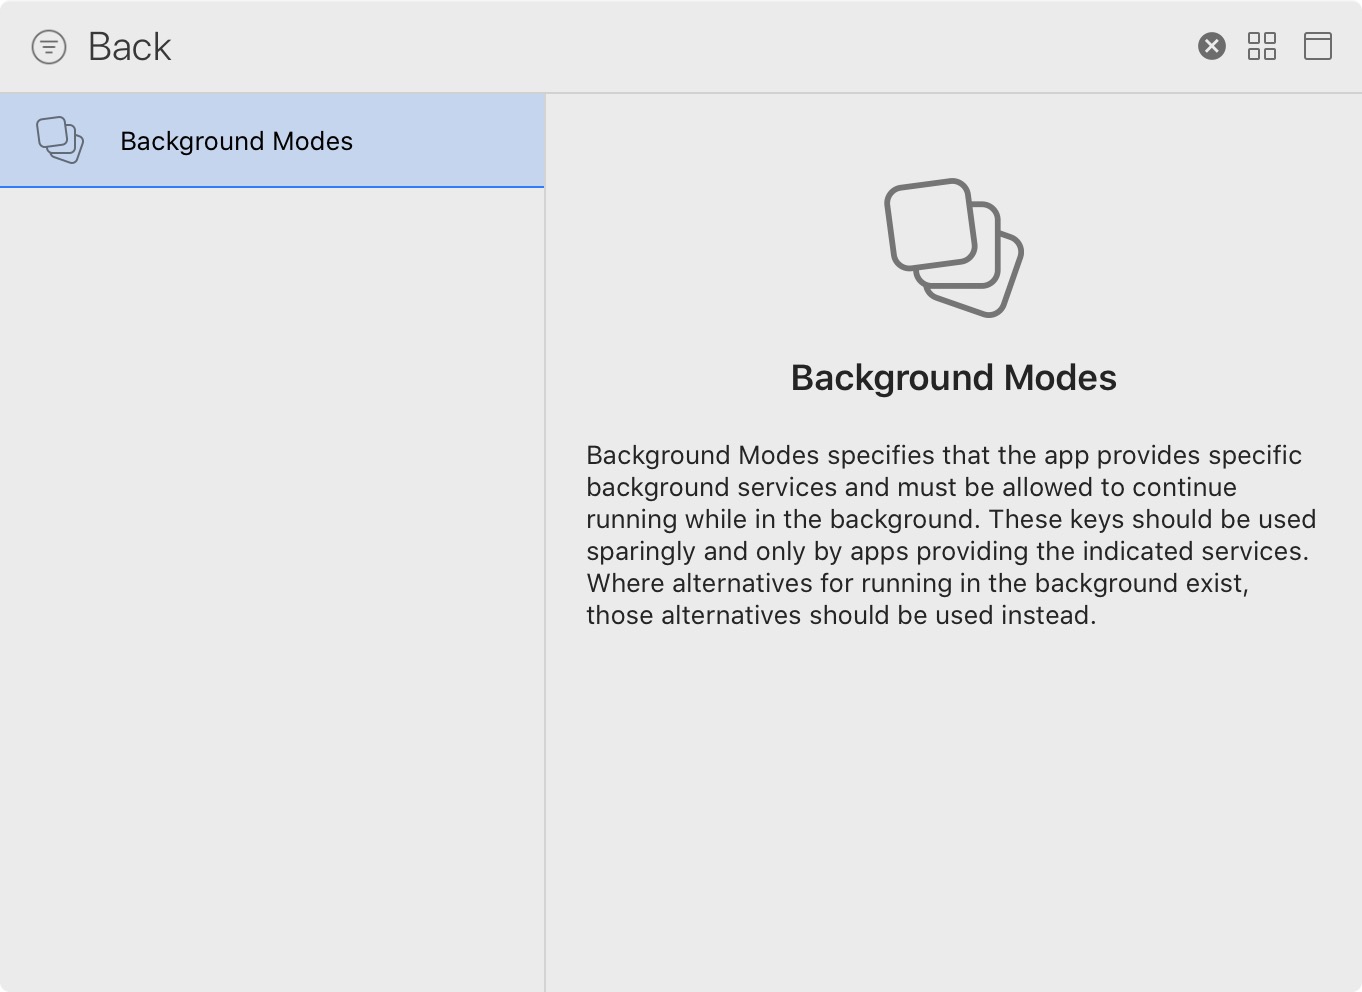
In the Background Modes section, select Remote Notifications.

The beauty of Core Data and CloudKit integration is that the system handles all the work required to listen for and respond to remote notifications. If you use CloudKit without Core Data, you’ll have to do some extra steps, which are outside the scope of this tutorial, to achieve this.
Migrating Existing Data
Now it’s time to tie your Core Data stack to the CloudKit container you just created. Open CoreDataStack.swift.
The first thing you need to do is to update and move the existing database file. With the old sync system, your SQLite file was in a special location and in a slightly different format. NSPersistentStoreCoordinator can handle moving and updating it for you. Add the following method:
func migrateIfRequired(_ psc: NSPersistentStoreCoordinator) {
  //1
  if FileManager.default.fileExists(atPath: CoreDataStack.storeURL.path) {
    return
  }

  do {
    //2
    let store = try psc.addPersistentStore(
      ofType: NSSQLiteStoreType,
      configurationName: nil,
      at: CoreDataStack.storeURL,
      options: CoreDataStack.storeOptions)
    //3
    let newStore = try psc.migratePersistentStore(
      store,
      to: CoreDataStack.storeURL,
      options: [NSPersistentStoreRemoveUbiquitousMetadataOption: true],
      withType: NSSQLiteStoreType)
    //4
    try psc.remove(newStore)
  } catch {
    print("Error migrating store: \(error)")
  }
}
Here’s what this code is doing:
- You’ll call this method every time the app starts up, but you only need to migrate once. If the new store had already been created, your work is done. You might wonder why you’re using the same store URL as you did before. With the iCloud sync you were using, the database file isn’t actually stored at the URL you give it, but within a complicated set of folders at the same location. With the new system, the database file will live at the given URL.
- You create the persistent store just like you did before, with the same options. This store is the old iCloud-synced one.
- You tell the persistent store coordinator to migrate the old store to the given URL, removing the iCloud-related metadata while it does so. This is another deprecated key, so you’ll get another warning, but you can’t remove deprecated functionality without using deprecated code!
- Finally, you remove the persistent store you just created from the coordinator. This is because migration is only going to happen once, so the actual setup of the new persistent store will happen outside this method, and you shouldn’t have two persistent stores linked to the same file.
Modernizing the Core Data Stack
Now you have migration ready to go, you can update to a more modern Core Data stack. As you may have hoped, the initialization process has been streamlined. How streamlined, you ask? Well, go ahead and delete the whole init().
Add a lazy property of type NSPersistentContainer:
private lazy var persistentContainer: NSPersistentContainer = {
  //1
  let container = NSPersistentContainer(name: "PlaceTag")
  //2
  migrateIfRequired(container.persistentStoreCoordinator)
  //3
  container.persistentStoreDescriptions.first?.url = CoreDataStack.storeURL
  //4
  container.loadPersistentStores { _, error in
    if let error = error as NSError? {
      fatalError("Unresolved error \(error), \(error.userInfo)")
    }
  }
  return container
}()
Here’s what you’re doing with this code:
-
NSPersistentContainerdoes a lot of the work thatinit()was doing before, including owning the persistent store coordinator, loading the model and owning the managed object context. It will automatically look for and load a data model with the name you give it at initialization. - Call your new migration code, passing the persistent store coordinator owned by the container.
- Tell the container to use a specific URL for the database file. This step is optional, but you need it here because you’ve migrated the store, so you want to have control over the file location.
- Call
loadPersistentStores(_:). This method loads or creates the backing SQLite storage file using the provided model and saves it to the appropriate location on disk. This is when you link the persistent store to the persistent store coordinator. If you hadn’t removed the migrated store earlier, you’d get errors at this point.
The persistent container owns the managed object context used for your UI, so next, you need to change the definition of context from a constant:
let context: NSManagedObjectContext
to a computed property:
var context: NSManagedObjectContext {
  persistentContainer.viewContext
}
You have now modernized your Core Data setup and removed the old iCloud sync.
Build and run. You’ll see the same data you added before.
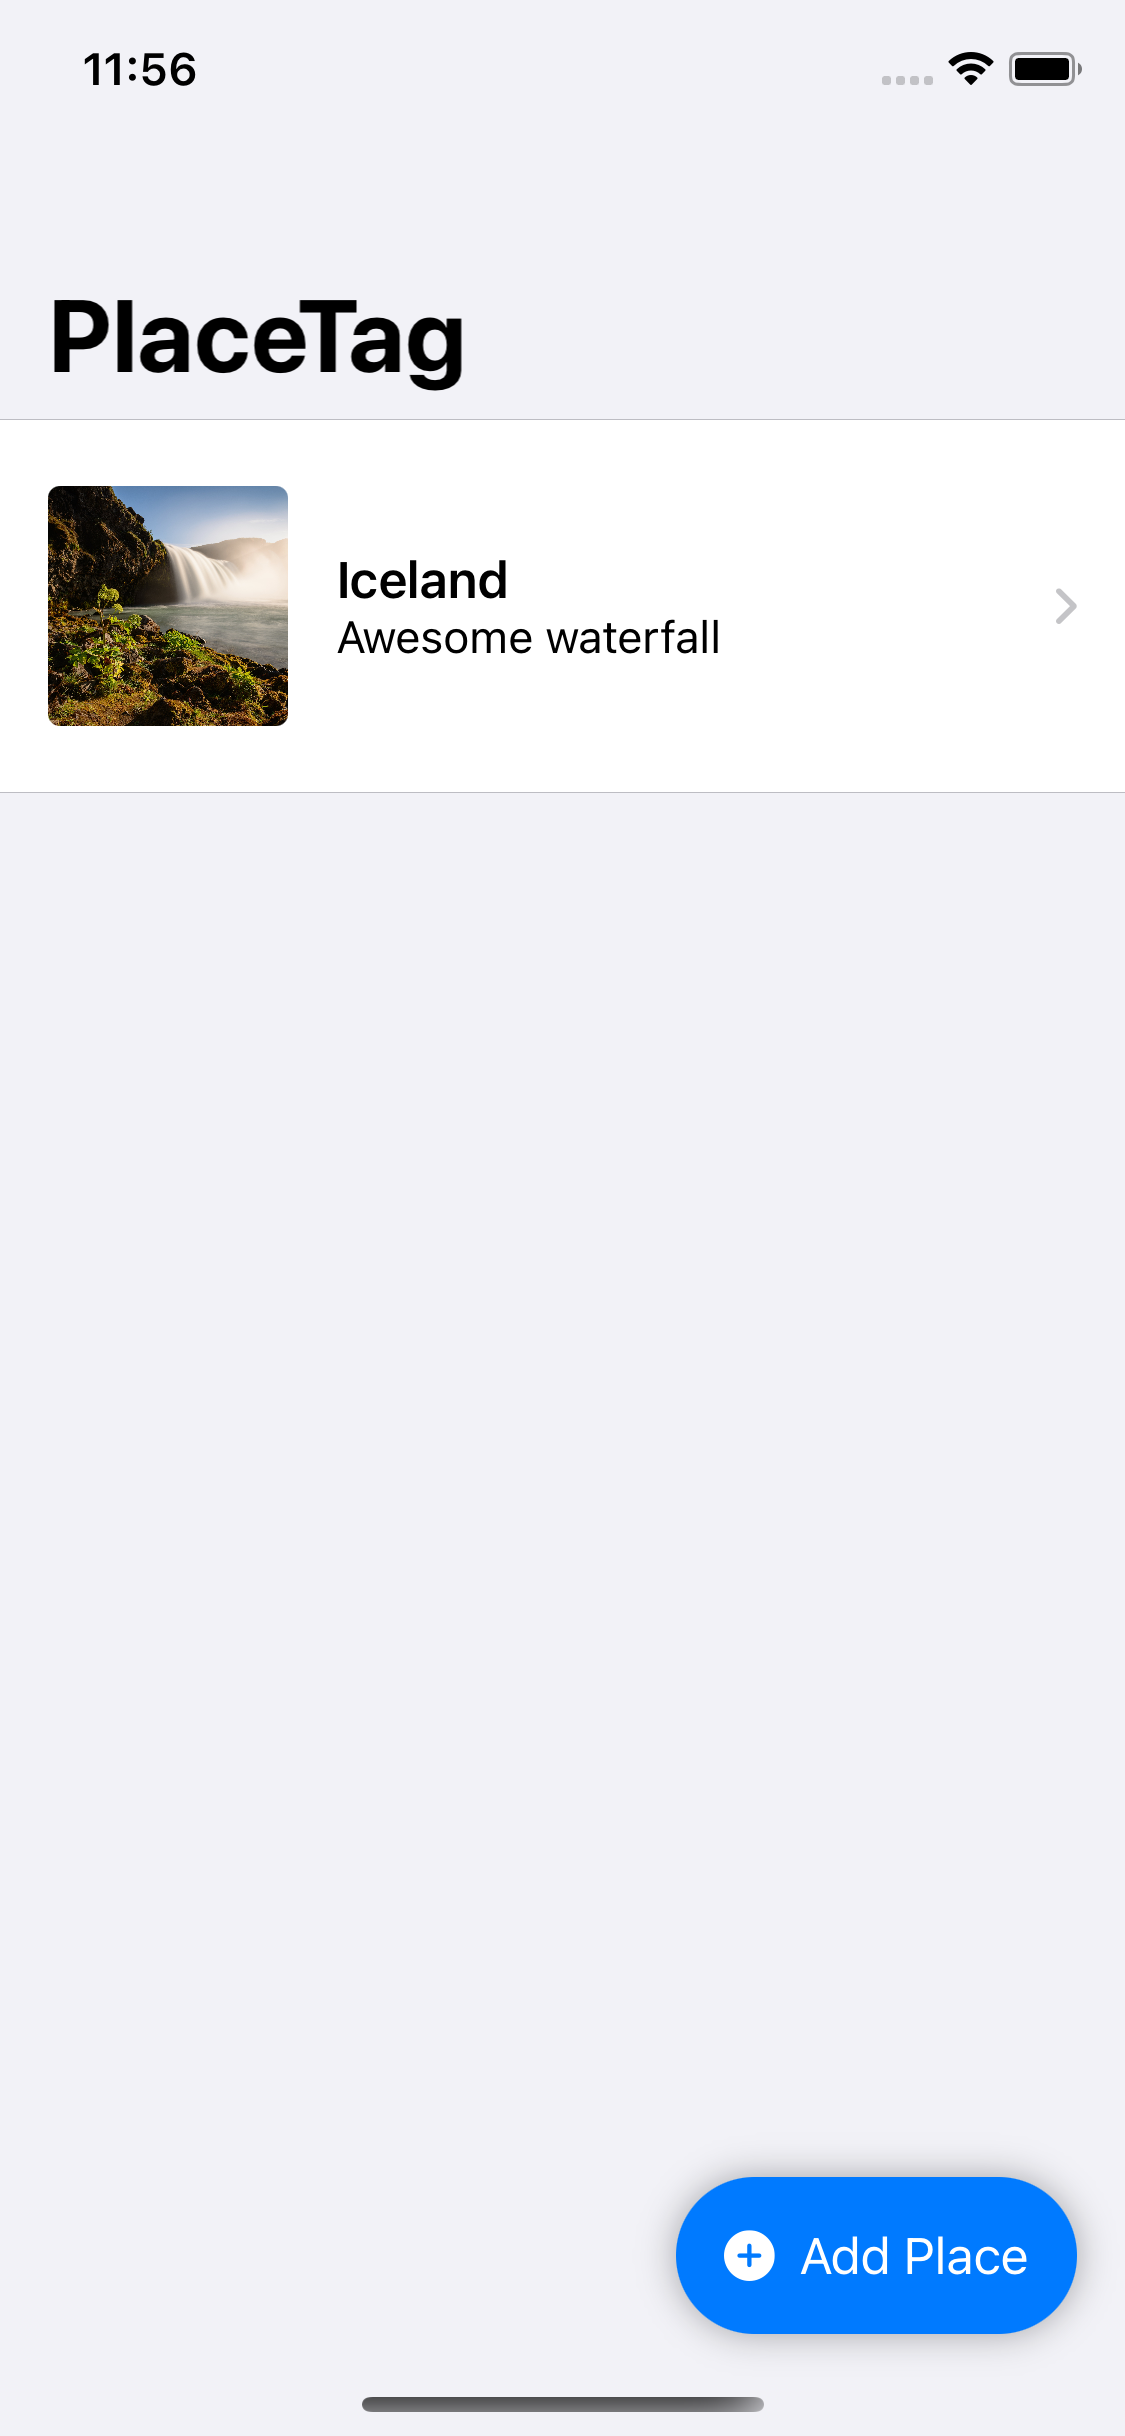
You can still add new places, just like before. But all your data is now local.