Getting Started With Flutter
Dive into the Flutter framework, which lets you build iOS, Android, web and desktop apps with a single codebase, by writing a cross-platform app using VS Code. By Jonathan Sande.
Making Network Calls
Earlier, you imported strings.dart into the project. Similarly, you can import other packages from the Flutter framework or even from other developers. For example, you’ll now use a couple of additional packages to make an HTTP network call and parse the resulting JSON response into Dart objects.
Importing Packages
Add two new imports at the top of main.dart:
import 'dart:convert';
import 'package:http/http.dart' as http;
You’ll notice the http package isn’t available. That’s because you haven’t added it to the project yet.
Navigate to pubspec.yaml in the root folder of your project. In the dependencies section, right under cupertino_icons: ^1.0.2, add the following line:
http: ^0.13.3
cupertino_icons package has.Now, when you save your pubspec.yaml, the Flutter extension in VS Code will run the flutter pub get command. Flutter will get the declared http package and make it available in main.dart.
You’ll now see blue lines under your two most recent imports in main.dart, which indicates they’re currently unused.

Don’t worry. You’ll use them in just a bit.
Using Asynchronous Code
Dart apps are single-threaded, but Dart provides support for running code on other threads. It also supports running asynchronous code that doesn’t block the UI thread. It uses the async/await pattern to do this.
async methods all runs on the UI thread. It’s just scheduled to run later, when the UI isn’t busy. If you actually did want to run some code on another thread, then you’d need to create what’s called a new Dart isolate.Next, you’ll make an asynchronous network call to retrieve a list of GitHub team members. To do this, add an empty list as a property in _GHFlutterState as well as a property to hold a text style:
var _members = <dynamic>[];
final _biggerFont = const TextStyle(fontSize: 18.0);
As you learned earlier, the underscores at the beginning of the names make the members of the class file-private. The dynamic keyword tells Dart that the list could hold anything. Generally, it’s not ideal to use dynamic because it opts out of the type safety system that Dart has. However, when making network calls, dealing with dynamic is unavoidable.
To make the asynchronous HTTP call, add _loadData to _GHFlutterState:
Future<void> _loadData() async {
  const dataUrl = 'https://api.github.com/orgs/raywenderlich/members';
  final response = await http.get(Uri.parse(dataUrl));
  setState(() {
    _members = json.decode(response.body) as List;
  });
}
Here, you’ve added the async keyword onto _loadData to tell Dart that it’s asynchronous. Another clue that it’s asynchronous is the Future return type. You put await in front of http.get() because that’s another asynchronous call that might take a while.
When the HTTP call completes, you pass a callback to setState that runs synchronously on the UI thread. In this case, you’re decoding the JSON response and assigning it to the _members list. If you set _members without calling setState, then Flutter wouldn’t rebuild the UI and your users wouldn’t realize that the state had changed.
Add an initState override to _GHFlutterState:
@override
void initState() {
  super.initState();
  _loadData();
}
This method calls _loadData when the state class is first created.
Now that you’ve created a list of members in Dart, you need a way to display them in a list in the UI.
Using a ListView
Dart provides a ListView that lets you show the data in a list. ListView acts like a RecyclerView on Android or a UICollectionView on iOS, recycling views as the user scrolls through the list to achieve smooth scrolling performance.
Add _buildRow to _GHFlutterState:
Widget _buildRow(int i) {
  return ListTile(
    title: Text('${_members[i]['login']}', style: _biggerFont),
  );
}
Here, you’re returning a ListTile that shows the login name parsed from the JSON for the member at index i. It also uses the text style you created before.
Replace the body line in the build method of _GHFlutterState with the following:
body: ListView.builder(
    padding: const EdgeInsets.all(16.0),
    itemCount: _members.length,
    itemBuilder: (BuildContext context, int position) {
      return _buildRow(position);
    }),
The padding adds some empty space around each list item — 16 logical pixels, in this case. Setting itemCount tells ListView how many rows it will have in total. Finally, call itemBuilder for every new row that’s visible on the screen, which you use as an opportunity to build your custom ListTile in _buildRow.
At this point, you’ll probably need to do a full restart rather than a hot reload. The Hot Restart button is useful for that. It’s still faster than completely stopping the app and rebuilding it.

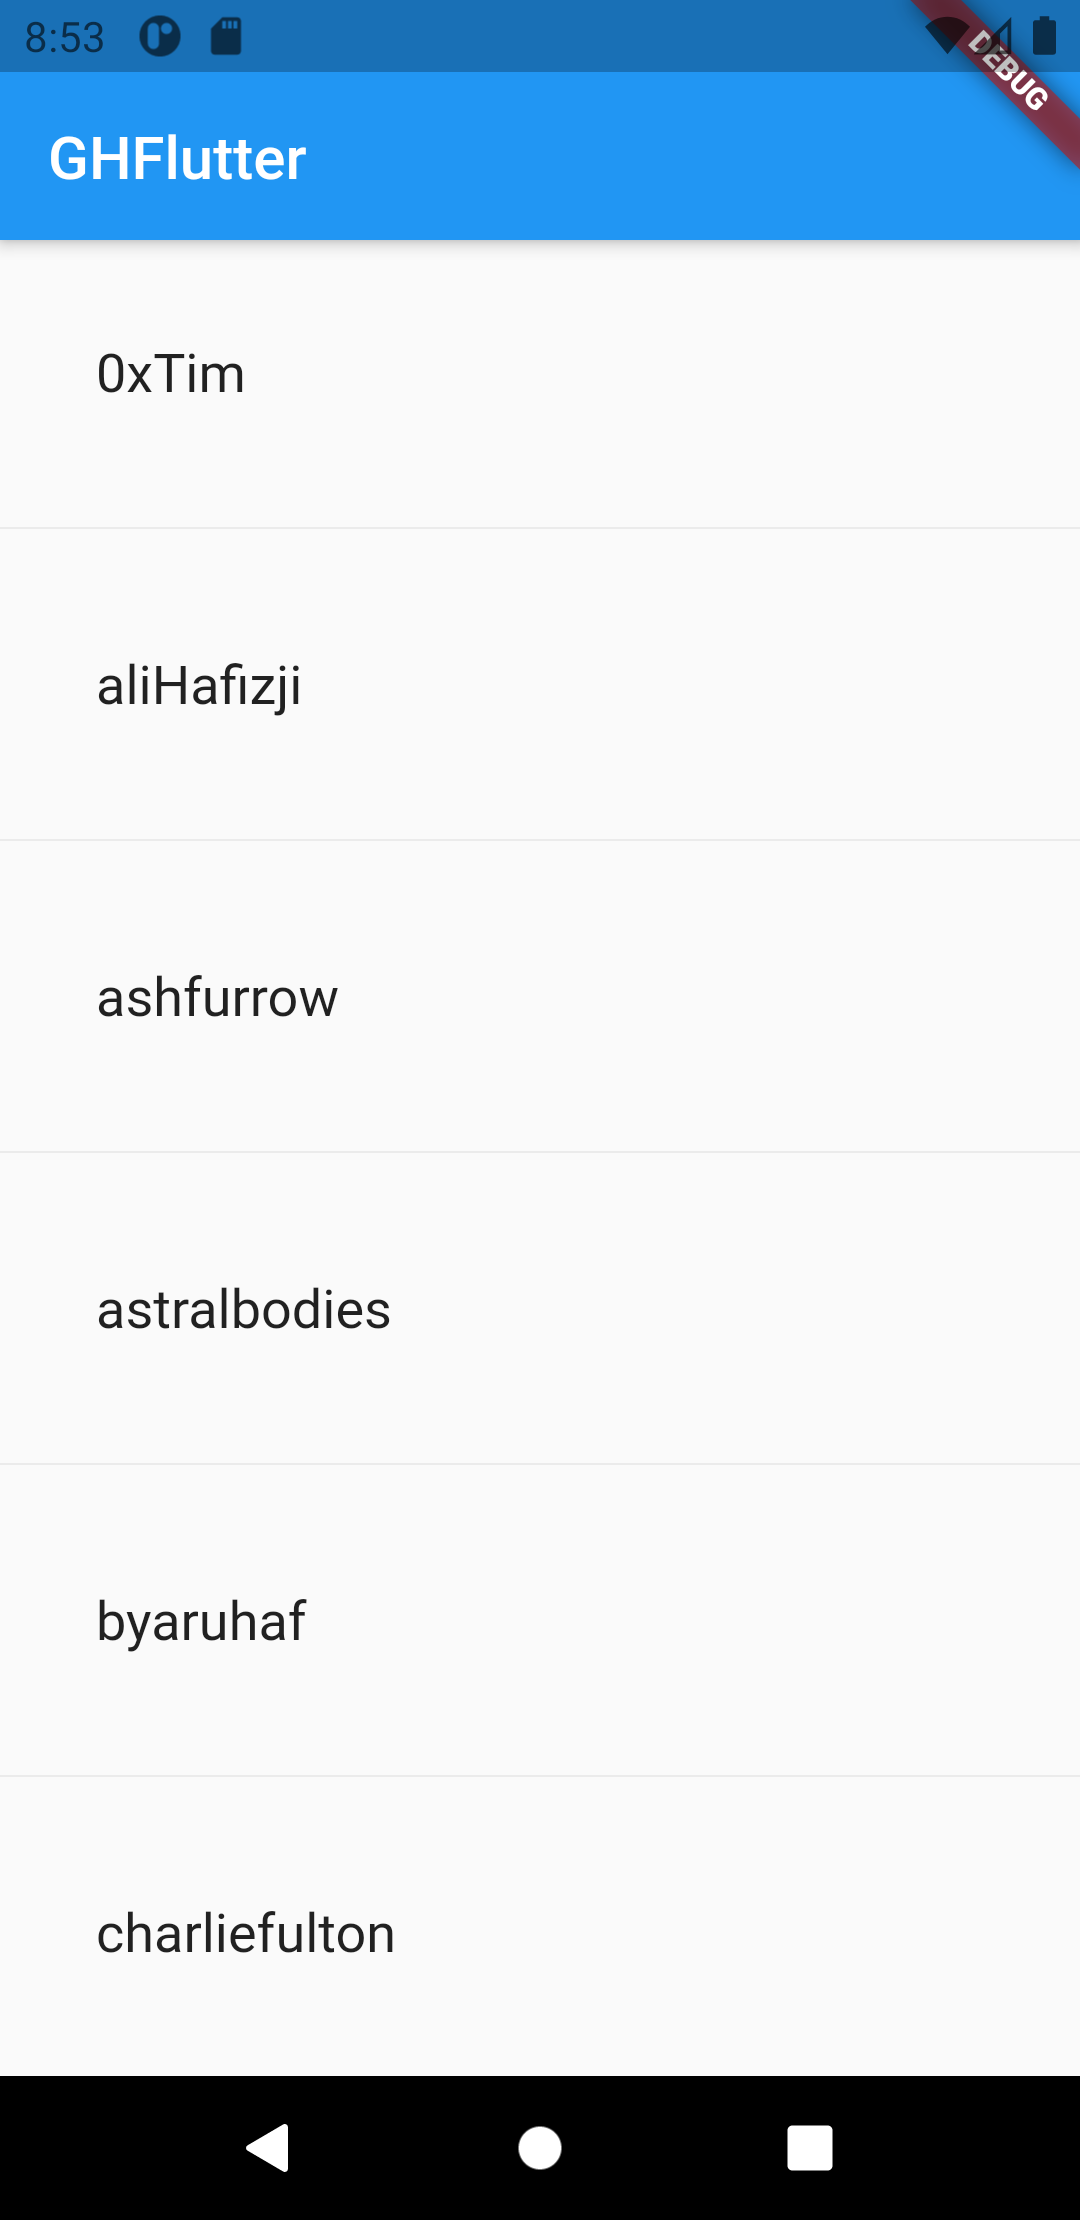
After the restart, you’ll see the following:
That’s how easy it is to make a network call, parse the data and show the results in a list!

Now, it’s time to make the list a bit prettier.
Adding Dividers
To add dividers into the list, you’ll use ListView.separated instead of ListView.builder. Replace the Scaffold’s body with the code below:
body: ListView.separated(
    itemCount: _members.length,
    itemBuilder: (BuildContext context, int position) {
      return _buildRow(position);
    },
    separatorBuilder: (context, index) {
      return const Divider();
    }),
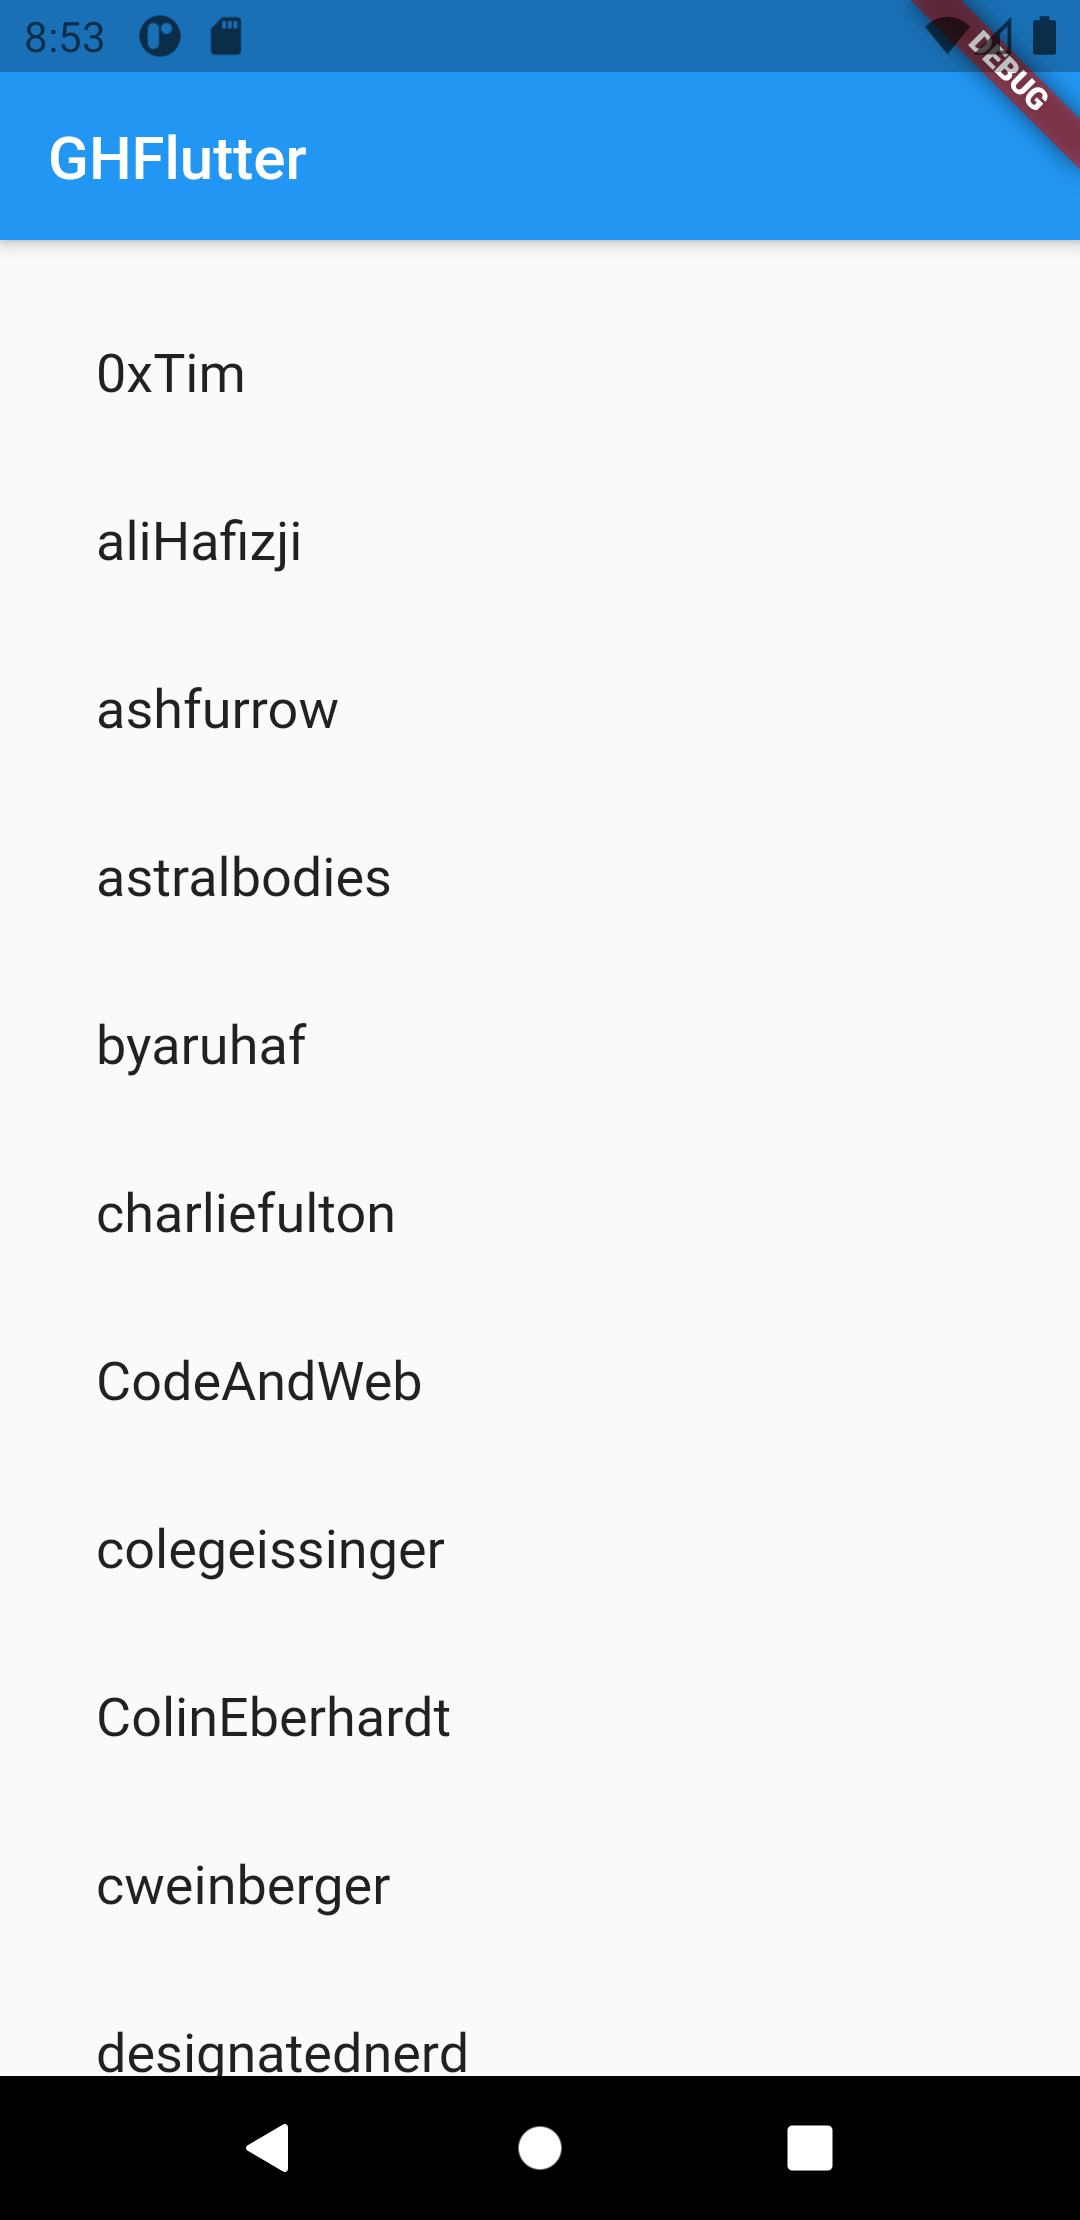
Using ListView.separated gives you a separatorBuilder option, which allows you to add a Divider between the list tiles. Now that you have dividers, you also removed the padding from the builder.
Hot reload. Now, you’ll see dividers between the rows:

To add padding to each row, wrap ListTile with Padding inside _buildRow. The easiest way to do that in VS code is to put your cursor on ListTile and press Command-. on macOS or Control-. on Windows. Then increase the padding to 16.0, as shown in the animated GIF below.

Alternatively, you can replace _buildRow with the following code to achieve the same result:
Widget _buildRow(int i) {
  return Padding(
    padding: const EdgeInsets.all(16.0),
    child: ListTile(
      title: Text('${_members[i]['login']}', style: _biggerFont),
    ),
  );
}
ListTile is now a child widget of Padding. Hot reload to see the padding appear on the rows, but not on the dividers.