Kotlin and Spring Boot: Getting Started
Learn how to use Spring Boot to create a web application with the help of Spring Initializr, build a REST API and test it. By arjuna sky kok.
Spring is one of the most famous web frameworks for web developers. Many developers choose Spring because it’s powerful and supports Dependency Injection and Aspect-Oriented Programming. However, some developers dislike the Spring framework because it’s a Java web framework bloated with many XML configuration files.
Pivotal created Spring Boot, a project created on top of the Spring framework to address those criticisms. It’s opinionated and assumes how you develop web applications. Spring Boot also uses auto-configuration to set up your web application.
In other words, you no longer have to write a lot of XML configuration files. Fortunately, Spring Boot also supports Kotlin and Gradle, which means you don’t have to use Java and write XML files. Yeah! :]
In this tutorial, you’ll build an NFT marketplace because everyone is excited about NFTs. Throughout this process, you’ll:
- Initialize a Spring Boot project.
- Run the web application.
- Write controller, model, configuration, exception and middleware.
- Write and run tests.
Getting Started
You got a new job as a web developer at a startup. Your CEO asks you to build an NFT marketplace. She wants to go mobile-first, so you need to build API endpoints.
Your colleagues need the REST API to build a mobile app to trade NFT. You choose Spring Boot because, well, you read this tutorial. :]
To create a new Spring Boot project, head to Spring Initializr, a website for initializing your Spring Boot project:

Choose Gradle Project in Project. Then select Kotlin as the Language. The default version in the Spring Boot will work just fine.
In the Project Metadata section, set com.raywenderlich in Group. Then fill nftmarketplace in Artifact and Name. Type The NFTs Marketplace in Description.
Use com.raywenderlich.nftmarketplace for Package name. Leave the default values for Packaging and Java.
Then, click Add in the Dependencies section:

The website will present a modal dialog where you can search for any Spring dependencies. For example, if you need a database, this is where you’d select the related component.
Select Spring Web since it comes with a web server where you’ll deploy the web application:

The final screen looks like this:

Click Generate at the bottom of the page. Your browser will download the project in a zip file:
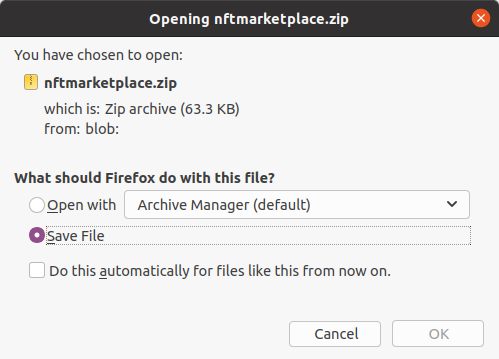
Download the file and extract it. That’s your starter project directory.
To work on this project, you need IntelliJ IDEA. You can learn how to install and set it up on the official IntelliJ IDEA website. Once you’re setup, move onto the next section.
Running the Project
Launch IntelliJ IDEA and open the starter project. Gradle will start syncing the project, which could take a couple of minutes.
In your Spring Boot project, you’ll find the web application code in the src folder. You’ll write the Kotlin code inside the main/kotlin folder.

Before you start writing the code for your web application, open build.gradle.kts. This is your Spring Boot Gradle build file where you’ll install the web application’s dependencies and change the project’s configuration:

In the file, you’ll find the Spring Boot plugin inside the plugins block and further down the Java version for this project. The org.springframework.boot:spring-boot-starter-web dependency is inside the dependencies block. Remember you added the Spring Web component in Spring Initializr.
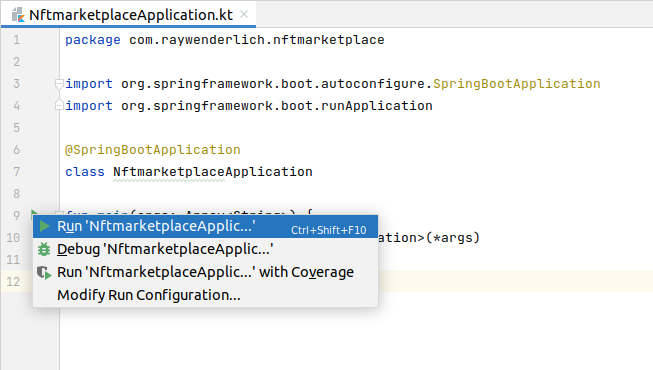
Time to run the web application and see what it looks like. Open NftmarketplaceApplication.kt:

Run the web application by clicking the green play button on the left side of the main function.
A pop-up dialog will appear. Click Run ‘NftmarketplaceApplic…’:
As you can see in the output on the run tool window, IntelliJ IDEA runs the code:

Your Spring project comes with an embedded Tomcat web server, which runs on port 8080. So what are you waiting for? Open the URL http://localhost:8080 in a web browser and you’ll see:

Unlike Django or Rails, Spring Boot doesn’t come with a default index page. It just gives you a 404 NOT FOUND page.
So, it’s time to work on your web application.
Creating a Controller
First, you’ll build a controller, specifically a REST controller. Under com.raywenderlich.nftmarketplace, create a package named controller by right-clicking it and then choosing New ▸ Package:

A pop-up dialog will appear. Add controller to the filled-in string:

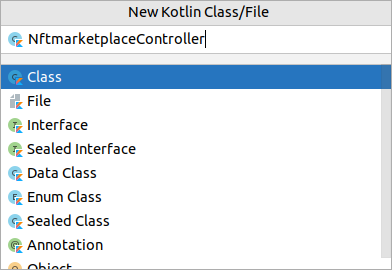
Then, under the controller directory, create a new file named NftmarketplaceController.kt by right-clicking controller and choosing New ▸ Kotlin Class/File:

In the pop-up dialog, type NftmarketplaceController. Then make sure Class is selected before pressing Enter:
You’ll get an empty class:
package com.raywenderlich.nftmarketplace.controller

class NftmarketplaceController {
}
Replace this empty class with:
package com.raywenderlich.nftmarketplace.controller

import org.springframework.web.bind.annotation.GetMapping
import org.springframework.web.bind.annotation.RestController

@RestController // 1
class NftmarketplaceController {

  @GetMapping("/homepage") // 2
  fun getHomePage() = "NFTs Marketplace"
}
Here’s a code breakdown:
-
First, you annotate the class with the
@RestControllerannotation. Spring Boot will scan it and recognize it as a controller class. Auto-configuration in Spring Boot means no need to write an XML file manually to register your controller. -
To map a GET request to a method, you annotate the method with
@GetMappingpassing the"/homepage"path as parameter. In this example, the method returns a string.
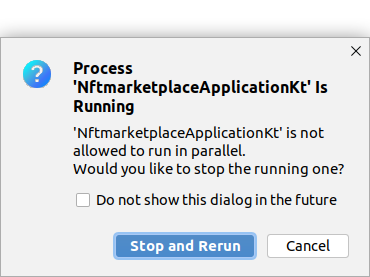
Rerun the project by clicking Run:

A pop-up dialog will appear asking if you’re sure you want to rebuild the project. Click Stop and Rerun:
Open http://localhost:8080/homepage. This time you get a text displayed on the web page:
In addition to getting data from the browser, you can also use curl:
curl http://localhost:8080/homepage
You’ll get:
NFTs Marketplace%
Instead of just simple strings, a REST API needs to return data in JSON format. But before that, you’ll create a model to represent the NFT.
Creating a Model
Create a new package under com.raywenderlich.nftmarketplace and name it model. Then create a new class under model and name it NFT. Replace the contents of the file with:
package com.raywenderlich.nftmarketplace.model

data class NFT(val id: Int, var name: String, var floor_price: Double)
The id and name are self-explanatory. The floor_price is an NFT’s cheapest price in the particular NFT’s collection.
Supporting a JSON GET Request
Go back to the controller code, NftmarketplaceController.kt. Create sample data of NFTs. Then, add the following code inside the class:
private var NFTs = mutableListOf(
  NFT(1, "CryptoPunks", 100.0),
  NFT(2, "Sneaky Vampire Syndicate", 36.9),
  NFT(3, "The Sevens (Official)", 0.6),
  NFT(4, "Art Blocks Curated", 1.1),
  NFT(5, "Pudgy Penguins", 2.5),
)
Then import:
import com.raywenderlich.nftmarketplace.model.NFT
You don’t need to do anything special to return this data in JSON format. Simply return the objects. Add the following method inside the class:
@GetMapping("")
fun getNFTs() = NFTs
Then import:
import org.springframework.web.bind.annotation.GetMapping
Spring Boot will serialize your mutable list of data class instances to a JSON string behind the scenes. Look at build.gradle.kts and you’ll notice a JSON library, jackson-module-kotlin:

You didn’t install it explicitly, but it’s included when you install the Spring Web component.
Rerun the project and open http://localhost:8080:

The web application displays NFTs in JSON format.
Executing a curl command:
curl http://localhost:8080
You’ll get:
[{"id":1,"name":"CryptoPunks","floor_price":100.0},{"id":2,"name":"Sneaky Vampire Syndicate","floor_price":36.9},{"id":3,"name":"The Sevens (Official)","floor_price":0.6},{"id":4,"name":"Art Blocks Curated","floor_price":1.1},{"id":5,"name":"Pudgy Penguins","floor_price":2.5}]
You need a method to add a new NFT to your mutable list. To do that, you’ll need to support a JSON post request.