Kotlin and Spring Boot: Getting Started
Learn how to use Spring Boot to create a web application with the help of Spring Initializr, build a REST API and test it. By arjuna sky kok.
Supporting a JSON POST Request
To support this type of request, you’ll need the @PostMapping annotation. Create a method inside the controller class:
@PostMapping("") // 1
@ResponseStatus(HttpStatus.CREATED) // 2
fun postNFT(@RequestBody nft: NFT): NFT { // 3
  val maxId = NFTs.map { it.id }.maxOrNull() ?: 0 // 4
  val nextId = maxId + 1 // 5
  val newNft = NFT(id = nextId, name = nft.name, floor_price = nft.floor_price) // 6
  NFTs.add(newNft) // 7
  return newNft
}
You’ll need these imports:
import org.springframework.http.HttpStatus
import org.springframework.web.bind.annotation.PostMapping
import org.springframework.web.bind.annotation.RequestBody
import org.springframework.web.bind.annotation.ResponseStatus
Here’s what you did:
Then you add @ResponseStatus with the HttpStatus.CREATED argument because, typically, after creating a resource like a new NFT, you emit the 201 CREATED response status. If you omit this annotation, you’ll get a default 200 OK response status.
-
First, you annotate the method with
@PostMappingto indicate this method handles a POST request. You use the same path,"", as the previous GET request. That’s not a problem because one path can serve two different requests. -
The method argument with the
@RequestBodyis the JSON object you’ll send to this path. - Then you get the greatest id of the existing NFTs.
- You calculate the id for the new NFT.
-
Then you create a new NFT with the calculated id, the
nameandfloor_price, both from the request body. - Finally, you add the new NFT to the list and return it as the response.
Then you add @ResponseStatus with the HttpStatus.CREATED argument because, typically, after creating a resource like a new NFT, you emit the 201 CREATED response status. If you omit this annotation, you’ll get a default 200 OK response status.
Rerun the project and create a new NFT executing this curl request:
curl -H "Content-Type: application/json" --request POST --data '{"name": "Cryptoadz", "floor_price": 26}' http://localhost:8080
And you’ll get:
{"id":6,"name":"Cryptoadz","floor_price":26.0}
Check the full list of NFTs by sending a GET request to http://localhost:8080:
curl http://localhost:8080
This is the result:
[{"id":1,"name":"CryptoPunks","floor_price":100.0},{"id":2,"name":"Sneaky Vampire Syndicate","floor_price":36.9},{"id":3,"name":"The Sevens (Official)","floor_price":0.6},{"id":4,"name":"Art Blocks Curated","floor_price":1.1},{"id":5,"name":"Pudgy Penguins","floor_price":2.5},{"id":6,"name":"Cryptoadz","floor_price":26.0}]
Mapping Path Variables
Checking one NFT from a list of a couple of NFTs isn’t a problem. But sometimes, you want to get one NFT’s information.
Create a new GET path by adding the following method to the class:
@GetMapping("/{id}") // 1
fun getNFTById(@PathVariable id: Int) : NFT? { // 2
  return NFTs.firstOrNull { it.id == id } // 3
}
Add the following import:
import org.springframework.web.bind.annotation.PathVariable
Here’s a code breakdown:
-
This time, inside the
@GetMappingannotation, you have anidparameter between curly braces. -
Because you also have a method parameter
id: Intannotated with the@PathVariableannotation, your method receives that parameter whenever the server receives a GET request to/1,/2or any number. Notice the return type is an optionalNFT. -
You try to find the NFT with the desired id and return it. If it doesn’t exist, you’ll return
null.
Rerun the project and execute the following curl requests:
curl http://localhost:8080/1
You’ll get:
{"id":1,"name":"CryptoPunks","floor_price":100.0}
Now, execute:
curl http://localhost:8080/100
Notice you don’t get any response since the NFT with id=100 doesn’t exist.
Now, try executing with the verbose option:
curl http://localhost:8080/100 -v
You’ll get:
*   Trying ::1...
* TCP_NODELAY set
* Connected to localhost (::1) port 8080 (#0)
> GET /100 HTTP/1.1
> Host: localhost:8080
> User-Agent: curl/7.64.1
> Accept: */*
>
< HTTP/1.1 200
< Content-Length: 0
< Date: Sat, 30 Oct 2021 22:41:49 GMT
<
* Connection #0 to host localhost left intact
* Closing connection 0
As you can see, the service responds 200 OK, even if the NFT doesn't exist.
A better way to show the NFT doesn't exist is to return a 404 NOT FOUND result. You'll do that in the next section.
Handling Exceptions
Now, you'll create a custom exception for your missing NFT case.
Under com.raywenderlich.nftmarketplace, create a package named exception. Then inside the package, create the NFTNotFoundException class and replace the file's content with:
package com.raywenderlich.nftmarketplace.exception

class NFTNotFoundException : Exception()
Inside the same package, create the ControllerAdvice class. Name it NFTErrorHandler and replace the file's content with:
package com.raywenderlich.nftmarketplace.exception

import org.springframework.http.HttpStatus
import org.springframework.http.ResponseEntity
import org.springframework.web.bind.annotation.ControllerAdvice
import org.springframework.web.bind.annotation.ExceptionHandler
import javax.servlet.http.HttpServletRequest

@ControllerAdvice // 1
class NFTErrorHandler  {
  @ExceptionHandler(NFTNotFoundException::class) // 2
  fun handleNFTNotFoundException(
    servletRequest: HttpServletRequest,
    exception: Exception
  ): ResponseEntity<String> {
    return ResponseEntity("NFT not found", HttpStatus.NOT_FOUND) // 3
  }
}
Here's what's happening:
-
When you annotate the class with
@ControllerAdvice, Spring Boot scans and registers this class asControllerAdvicefor your controller. -
You annotate the method with
@ExceptionHandler, which accepts the exception class you created, letting Spring Boot know that this method can handle that exception. -
You return a
ResponseEntity. The first argument ofResponseEntityis the result you send to the client which can be a simple text string or a JSON string. The second argument is the status type.
Your job isn't finished. Go back to the controller and replace getNFTById with:
import com.raywenderlich.nftmarketplace.exception.NFTNotFoundException

...

@GetMapping("/{id}")
fun getNFTById(@PathVariable id: Int): NFT {
  val nft = NFTs.firstOrNull { it.id == id }
  return nft ?: throw NFTNotFoundException()
}
Now, instead of returning null, you throw an exception. Therefore, if you try to retrieve an NFT that doesn’t exist, you'll get a 404 NOT FOUND result.
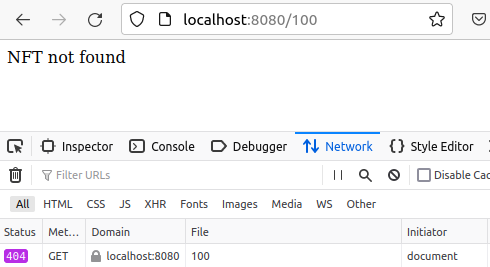
Rerun the project and go to http://localhost:8080/100:
Or executing curl.
curl http://localhost:8080/100 -v
You'll see this result:
*   Trying ::1...
* TCP_NODELAY set
* Connected to localhost (::1) port 8080 (#0)
> GET /100 HTTP/1.1
> Host: localhost:8080
> User-Agent: curl/7.64.1
> Accept: */*
>
< HTTP/1.1 404
< Content-Type: text/plain;charset=UTF-8
< Content-Length: 13
< Date: Sun, 31 Oct 2021 05:03:15 GMT
<
* Connection #0 to host localhost left intact
NFT not found* Closing connection 0
Middleware
You got a feature request from your CEO. She wants to log the UTM marketing flag, so you can reward people who promote your NFT marketplace.
You could modify all of your controller's methods, but that would be too cumbersome. Instead, use middleware.
Under com.raywenderlich.nftmarketplace, create a new package named middleware. Inside middleware, create a class named RequestLoggingFilter and replace the content of the file with:
package com.raywenderlich.nftmarketplace.middleware

import org.slf4j.LoggerFactory
import org.springframework.stereotype.Component
import javax.servlet.Filter
import javax.servlet.FilterChain
import javax.servlet.ServletRequest
import javax.servlet.ServletResponse

@Component
class RequestLoggingFilter : Filter {
  val loggerFactory = LoggerFactory.getLogger("NFT Logger")

  override fun doFilter(
    servletRequest: ServletRequest,
    servletResponse: ServletResponse,
    filterChain: FilterChain
  ) {
    val utmSource = servletRequest.getParameter("utm_source")
    loggerFactory.info("Logging UTM source: $utmSource")
    filterChain.doFilter(servletRequest, servletResponse)
  }
}
To execute code automatically inside middleware, you create a Filter class and annotate it with @Component so Spring Boot can register your class in middleware.
To add code inside middleware, you create doFilter, which accepts a request, a response and a filter chain. You get the UTM parameter from the request object. In this use case, you don't alter the response, but you could if you wanted to.
Rerun the application and execute:
curl "http://localhost:8080/1?utm_source=raywenderlich"
You'll get this response:
{"id":1,"name":"CryptoPunks","floor_price":100.0}
Check the logging output on the run tool window:
