Introduction to GDScript in Godot 4 Part 2
In this second part of the GDScript introduction, you’ll learn about state machines, adding and removing nodes and how to make a camera follow a node. By Eric Van de Kerckhove.
Avatar Finishing Touches
As a final addition to the avatar script, the animation and direction of the sprite should change depending on the state and movement direction. The first step to do that is getting a reference to the child node AnimatedSprite2D. Remember the drag-and-drop trick to add node references: drag AnimatedSprite2D onto the player_avatar script and hold CTRL/CMD before releasing.
This will add the following code:
@onready var animated_sprite_2d: AnimatedSprite2D = $AnimatedSprite2D
Rename animated_sprite_2d to sprite as the original name is a bit wordy. Next, add the following if-statement to the _process_on_ground function:
if velocity.x == 0:
    sprite.animation = "idle"
else:
    sprite.animation = "run"
This will change the avatar’s animation when it’s on the ground. If there’s no horizontal velocity, the idle animation is played, while run is played if the avatar is moving. As with the jumpers, you can find these animations by clicking the AnimatedSprite2D node and taking a look at the bottom of the editor.
![]()
Test the game again to see the results. Notice the avatar isn’t switching to his idle animation, why is that?
To investigate the problem, add this print call right above the if-statement you added in _process_on_ground:
print(velocity)
This will print out the avatar’s current velocity, which should be (0, 0) when the avatar is on the same horizontal position as the cursor. Run the project once again and keep an eye on the console in the editor.
Notice how the avatar’s X velocity is never zero. This is because there are only two ways the avatar can move at the moment: left or right. This is due to the way the movement code is set up in _process:
var cursor_right : bool = (mouse_pos.x - global_position.x) > 0

...

if cursor_right:
    if global_position.x < viewport_size.x - viewport_border:
        velocity.x = move_speed
else:
    if global_position.x > viewport_border:
        velocity.x = -move_speed
Basically, the avatar will have a positive X velocity if the cursor is right and in all other cases it will have a negative X velocity. You can add a case where the X velocity will be zero if the cursor is already close to the avatar. For this, you need to keep track of the distance to the cursor, which is already done by the cursor_right variable with mouse_pos.x - global_position.x.
To store this calculation in a variable, replace the cursor_right variable declaration with the following two lines:
var cursor_x_pos_relative_to_avatar : float = mouse_pos.x - global_position.x
var cursor_right : bool = cursor_x_pos_relative_to_avatar > 0
This adds a descriptive variable named cursor_x_pos_relative_to_avatar that replaces the relative position calculation cursor_right was using. As before, the value of this calculation is the distance between the avatar and the cursor, with a positive value meaning the cursor is to the right of the avatar.
Now you need a variable that sets the minimum distance to the cursor before the avatar moves horizontally, so add this at the top of the script, below var gravity:
@export var min_distance_before_move : float = 10.0
This sets the distance in pixels to the cursor before the avatar will move. To use the variables you added, replace the if-statement in _process with the following:
if abs(cursor_x_pos_relative_to_avatar) > min_distance_before_move: # Added this line
    if cursor_right:
        if global_position.x < viewport_size.x - viewport_border:
            velocity.x = move_speed
    else:
        if global_position.x > viewport_border:
            velocity.x = -move_speed
Only the first line is new code here, which does the following:
-
absis short for absolute and returns the absolute value of any given parameter, which means the value becomes positive. -1 becomes 1 for example. -
cursor_x_pos_relative_to_avatar, the distance to the avatar, is now always positive. If this distance is bigger than the minimum move distance, continue with the movement logic.
Now run the project again and you’ll see the avatar finally stands idle when the cursor is near.
![]()
Go ahead and remove the print line from _process_on_ground now, as that’s not needed anymore.
To make the avatar turn in the right direction, add this one-liner to _process, right below var cursor_right:
sprite.flip_h = !cursor_right
This sets the flip_h property on the avatar’s Sprite2D node to true if the cursor is to the right, and false if it’s to the left. The exclamation point inverts the value of cursor_right, changing true into false and vice-versa.
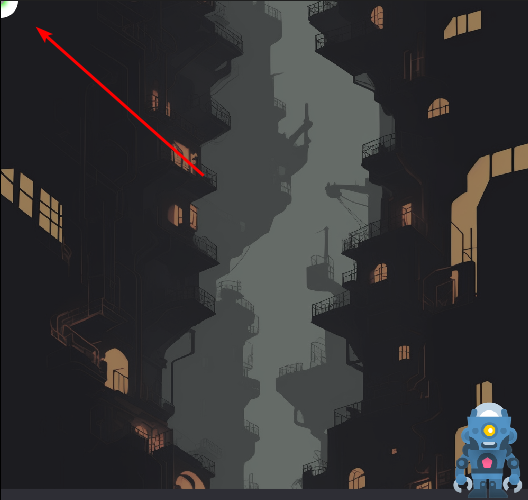
Test out the changes by pressing F5 and making the avatar move around, it should now rotate as expected.
![]()
As a final cherry on top, the animations for jumping and falling should be set as well. To do this, add the following line to the _process_in_air function, inside the if velocity.y > 0 case:
sprite.animation = "falling"
Next, add this line to the else case of the same if-statement, replacing the pass:
sprite.animation = "jump"
These two lines change the active animation like they did for the idle and run animations.
The full _process_in_air function should look like this now:
func _process_in_air(delta) -> void:
    velocity.y += delta * gravity

    if velocity.y > 0:
        sprite.animation = "falling"
        if global_position.y >= start_height:
            var _result = get_tree().reload_current_scene()
    else:
        sprite.animation = "jump"
Run the project once more to test the jump and fall animations.
That completes the player avatar for now!
With the jumpers and avatar fully working, it’s time to add a whole bunch more jumpers so the avatar can get to new heights.
Instantiating Scenes With Code
The next step in this little game is automatically spawning a bunch of jumpers via code. To start off, delete all Jumper nodes from the game scene by selecting them all and hitting Delete on your keyboard.

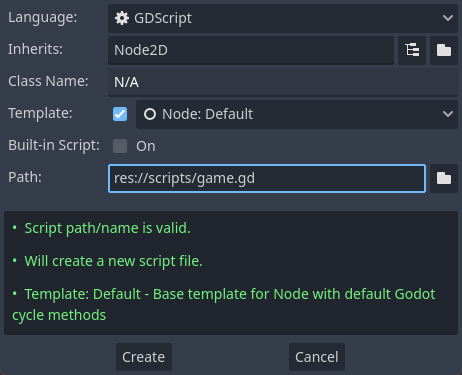
Next, create a new child node for the Game node by right-clicking it and selecting Add Child Node. In the Create New Node window, select Node2D for its type and click the Create button at the bottom.
This new node will act as a parent node for the jumpers you’ll be generating, so name it Jumpers. You can do this by pressing F2, or by right-clicking the node and selecting Rename in the context menu. Now that you prepared the game scene, it’s time to add another script! Select the Game node and click the Add Script button to add a new script, leave it at its default name and make sure to create it in the scripts folder.
Godot will now open the new game script in the script editor, ready for you to add logic. Firstly, you’ll need a reference to the jumper scene to be able to create new instances of it. The most flexible way to do this is by exporting a PackedScene variable, so you can change what scene to spawn via the editor. To do that, add the following line below extends Node2D:
@export var jumper_scene : PackedScene
PackedScene is an interface to a scene file which allows you to instantiate nodes in your scene later on. Save the script and reselect the Game node in the Scene dock. You’ll now see a new property appearing in the Inspector named Jumper Scene.

To assign a scene, drag the jumper.tscn scene file from the FileSystem dock onto the property or click the property and select Quick Load ▸ scenes/jumper.tscn.
Next, you need a reference to the Jumpers node, so drag that node onto the script editor while holding CTRL/CMD to add this line:
@onready var jumpers: Node2D = $Jumpers
Rename this variable to jumpers_parent to avoid confusion later on. With both references in place, you can now create new jumpers. For a quick test, add the following to the _ready function, replacing the pass keyword:
var new_jumper = jumper_scene.instantiate() # 1
jumpers_parent.add_child(new_jumper) # 2
This will instantiate a new jumper and add it as a child of the Jumpers node:
- Instantiate an instance of the jumper scene and store its reference in a
new_jumpervariable. - Make the new jumper a child of
jumpers_parent, the Jumpers node in the Scene dock.
Now run the project by pressing F5 and take a look around. Can you spot the jumper?
It’s at the top left of the window, mostly hidden. This isn’t because it’s shy, but because its default position is at (X:0, Y:0), which happens to be the top left of the window.
The code works though, which is the important part! To randomly spawn the jumpers, you’ll need to think about how many and where to spawn them first. Consider the following parameters:
- Amount of jumpers
- Height of first jumper
- Y-spacing between jumpers
- Random X-position range
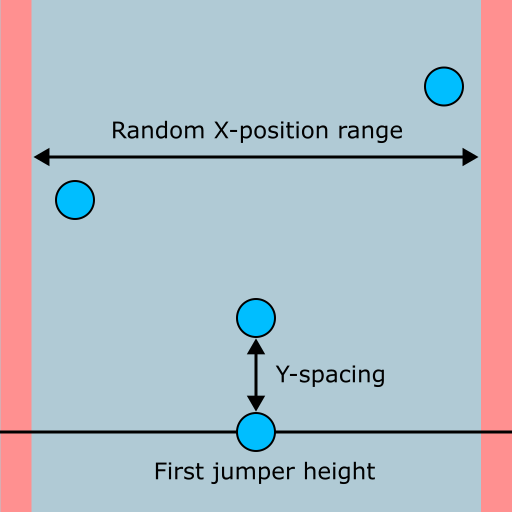
The illustration above is a visual representation of most of these parameters. With this in mind, add the following variables right below @export var jumper_scene:
@export var jumpers_to_spawn : int = 50 # 1
@export var first_jumper_height : float = 400.0 # 2
@export var spacing_between_jumpers : float = 350.0 # 3
@export var jumper_x_pos_spawn_range : Vector2 = Vector2(80, 930) # 4
These will allow you to tweak the parameters in the editor until the gameplay feels good. The defaults I provide here felt right to me, but feel free to change them later on.
Here’s a quick rundown:
- I think this one speaks for itself, it’s the amount of jumpers to spawn.
- This is the Y-position of the first jumper.
- The vertical amount of pixels between each jumper. Smaller values make the game easier, while bigger values provide more challenge.
- The minimum and maximum X-position of each jumper, represented with a
Vector2. Every new jumper will have a random position within this range.
Now for the fun part: coding the logic that will use these parameters to generate a load of jumpers. Create this new function below _ready:
func _create_jumpers(start_pos : float) -> void: # 1
    for y in range(0, jumpers_to_spawn): # 2
        var new_jumper = jumper_scene.instantiate() # 3
        jumpers_parent.add_child(new_jumper) # 4
        var jumper_x_pos = randf_range(jumper_x_pos_spawn_range.x, jumper_x_pos_spawn_range.y) # 5
        var jumper_y_pos = -y * spacing_between_jumpers + start_pos # 6
        new_jumper.global_position = Vector2(jumper_x_pos, jumper_y_pos) # 7
At first glance, this might look a bit daunting. By looking at the separate pieces though, you’ll see it’s not too complicated:
- The
_create_jumpersfunction takes a single parameter:start_pos, which is the position of the first jumper. - This is a
for-loop, it will execute the code below it a certain amount of times and keep track of the times it has ran. In this case,rangeis used to make it run from 0 to the amount of jumpers to spawn. The amount of times it has looped is stored in theyvariable. - Instantiate a new jumper and store a reference to it in
new_jumper. - Make the new jumper a child of
jumpers_parent. - The
randf_rangemethod accepts two numbers and returns a random number between the two. TheXandYvalues ofjumper_x_pos_spawn_rangeare passed into it, as these are the minimum and maximum X-positions for the jumpers. The output is stored injumper_x_pos. - Here, the
yvariable from the loop is negated and multiplied with the spacing between the jumpers. Remember, negativeYis up in Godot, which is why the value is negated. The starting position is used as an offset, so it’s added as well. The result is the Y-position for the jumper, which is stored injumper_y_pos. - Set the position of the new jumper to the X and Y-position calculated in the previous two steps.
I hope that cleared up how this function works. It uses some of the most commonly utilized methods like range and randf_range, which are invaluable tools when creating your own games.
Now you just need to call it to actually create the jumpers, so replace everything in _ready with this line:
_create_jumpers(first_jumper_height)
This calls the function you created and passes the height of the first jumper it should create. Time for another test run! Play the project and check if the jumpers are created. If all went well, you should be seeing two jumpers on the screen.
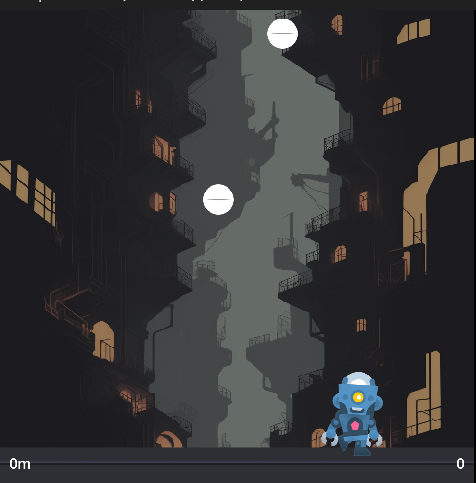
If you jump on them, you can get the avatar to tremendous heights and… Oh right, the camera is stationary so the avatar vanishes in the air when you hit the jumpers.