
Introduction to GDScript in Godot 4 Part 2
In this second part of the GDScript introduction, you’ll learn about state machines, adding and removing nodes and how to make a camera follow a node. By Eric Van de Kerckhove.
Camera Follow and Background Scrolling
Up until now this wasn’t an issue as the avatar couldn’t jump high. Now though, it’s clear the camera needs to follow the avatar. For this you’ll need to create another script.
Select Camera2D and create a new script named follow_cam.gd in the scripts folder. Remove its _ready function and add these variables in its place:
@export var node_to_follow : Node2D # 1
@export var follow_speed : float = 10.0 # 2
@export var y_offset : float = -650.0 # 3
These are all variables you need for a camera to follow a node around:
- The
Node2Dto follow. You’ll assign the avatar node to this. - The speed in pixels per second at which the camera will move towards its target.
- An offset of camera’s Y-position relative to the target. This move the camera up vertically so the avatar at the bottom of the view.
Now save the script and reselect Camera2D in the Scene dock. Drag the PlayerAvatar node from the Scene dock onto the Node to Follow property in the Inspector to set it as the camera’s target.
![]()
Next, add this to the _process function, replacing the pass:
var target_position = Vector2(global_position.x, # 1
    node_to_follow.global_position.y + y_offset)
global_position = global_position.lerp(target_position, delta * follow_speed) # 2
This makes the camera follow its target smoothly:
- Calculate the position the camera should be. It’s X-position will always stay the same, but its desired Y-position is equal to that of the node it’s following plus the Y-offset. Store this value in
target_position. - This changes the camera’s position by using the
lerpmethod, which stands for linear interpolation.lerpallows you to smoothly transition from one position to another. Its first parameter is the final position and the second parameter is the amount of pixels to move in a frame to reach that position. The camera will move closer to its goal a tiny bit every frame.
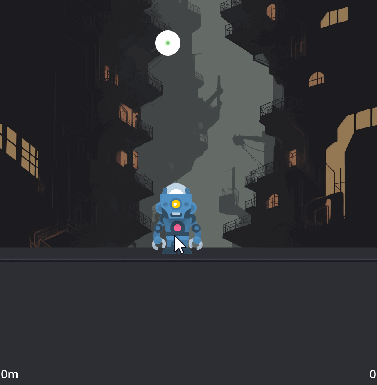
Play the project to test the camera out. It should now follow the avatar around when jumping and falling.
Awesome! The basic gameplay is now complete, if you wanted this game to last less than a minute anyway. Here’s a challenge for you if you feel like it: try to reach the top of the jumpers. This will give you a feel for the balance of the game, so you can tweak the distance between jumpers, the avatar’s jump height, gravity and so on.
While playing around, you might have noticed the background doesn’t move. This isn’t a huge issue, but if you want to add that extra splash of polish, follow along the next optional steps to make it scroll. Alternatively, you can skip to the Creating Infinite Jumpers section to finish up the game.
The background is a Sprite2D with a seamless background as its texture. This means it can be scrolled along its Y-axis without any gaps or noticeable changes. You can make it scroll along based on the camera’s position with a few lines of code.
Select Background and create a new script named scrolling_background.gd in the scripts folder. Add the following variables below extends Sprite2D:
@export var starting_position_offset : Vector2 = Vector2(0, 1024) # 1
@export var texture_size : Vector2 = Vector2(1024, 2048) # 2
@export var scroll_multiplier : float = 0.25  # 3
Here’s what these are used for:
- This is an offset that will be applied to the background’s position at the start. This is needed to move the sprite up a bit, so it fills the window.
- The size of the final texture. The background texture’s size is 1024×1024 pixels, but you need more vertical space so no gaps will appear at the edges. For normal textures, this would stretch the texture and make it look horrendous. The background texture is set to repeat though, so it simply adds more of the same texture vertically.
- This value gets multiplied with the camera’s position for a parallax-like effect as the background moves slower than the camera.
Next, add this to _ready to set the initial position for the background:
global_position = get_parent().global_position - starting_position_offset
This changes the background’s position to that of its parent, Camera2D and subtracts the position offset from it.
Finally, add this to _process to complete the script:
region_rect = Rect2(0, global_position.y * scroll_multiplier, texture_size.x, texture_size.y)
A Rect2 represents a rectangle using four parameters: X-position, Y-position, width and height. By adjusting the background’s region_rect, the rectangle that sets what part of the texture should be displayed, the texture gets scrolled. More specifically, by moving the Y-position up and down along with the camera’s position, you get a nice scrolling effect.
Now run the project to see what effect this has on the game.
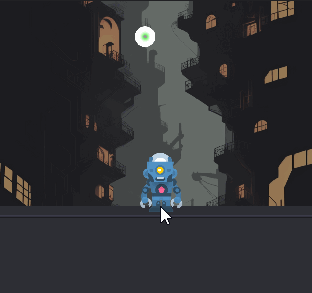
Now that looks cool! It’s a small touch, but it adds a lot to the feel of the game, don’t you think?
Next up is spawning and removing jumpers infinitely to keep the game going as long as the player can keep up, or gives up. :]
Creating Infinite Jumpers
The plan is to keep spawning new jumpers in whenever the avatar gets to a certain height. To achieve this, you need to keep track of the highest point the avatar reached and the position of the last spawned jumper. You can save the latter as you know the position of all spawned jumpers while instantiating them. To store the Y-position of the last jumper spawned, add the following variable below the others in the game script:
var last_jumper_y_position : float
You can assign this value by adding this to the _create_jumpers function, at the end of the for-loop:
last_jumper_y_position = new_jumper.global_position.y
This set the value of last_jumper_y_position to the Y-position of every new jumper. Each time the for-loop finishes running, this value will be set to the highest jumper.
Cool, but how is the game script supposed to know what the avatar’s highest jump is? Why, with signals of course!
The player avatar needs to keep track of its current height and highest achieved height. Then, whenever it reaches a new high point, it should emit a signal which can be connected to the game script. To store the highest point reached, open the player_avatar script and add this variable above the _ready function:
var highest_point_reached : float
This will store the highest Y-position that the avatar has reached.
Next is the signal that needs to be emitted whenever a new height is reached. Add it by adding this line below the variable you just added:
signal new_height(height : float)
Unlike the signals you’ve seen up, this signal accepts a parameter: the new height that was reached. This is super useful as this way you can notify the game script of the new height and pass the value in one go.
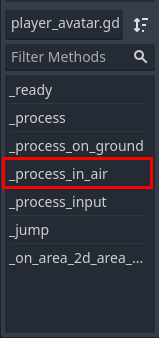
To update highest_point_reached and emit this signal, add the following at the end of the _process_in_air function:
if global_position.y < highest_point_reached: # 1
    highest_point_reached = global_position.y # 2
    new_height.emit(highest_point_reached - start_height) # 3
This checks if the current position is higher than the one recorded, then updates the variable and emits a signal if that’s the case:
- Check if the current Y-position is lower than the one stored in
highest_point_reached. Remember, negative Y is up in Godot, so the lower the negative value in the Y-position, the higher up the avatar is. - Set the value of
highest_point_reachedto the current Y-position. - Emit the
new_heightsignal and pass the highest point reached minus the starting height. By subtractingstart_height, the emitted height will start at 0.
You can now connect the new_height signal to the game script by opening the game scene, selecting PlayerAvatar and double-clicking the new_height signal in the Node menu on the right.
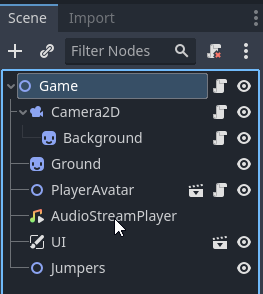
Make sure Game is selected and click the Connect button in the signal connection window.

This will add a new _on_player_avatar_new_height function to the game script. Now the game script is aware of the avatar’s top height, it can react to it by spawning in more jumpers. Replace the pass in the function that was just added with the following:
if height < last_jumper_y_position: # 1
    _create_jumpers(height) # 2
Here’s what this does:
- If the height passed by the avatar is lower than the last created jumper…
- Create a batch of jumpers, starting at the passed height.
Time to take the game for another spin! Lower the amount of jumpers to spawn at once from 50 to 10 by changing the Jumpers to Spawn property of the Game node and pressing Enter. This will make it easier to test if everything is working. Now run the project, keep jumping up and see if the jumpers keep appearing.
The game is getting close to being done now, with just a few tidbits remaining. In the final section below, you’ll learn how to update UI elements using scripting.