Using the Terrain Tools in Unity
Learn to create and manage a wide range of terrains in your apps by using Unity’s powerful Terrain Tools and the all new Terrain Toolbox API. By Mauro Fuentes.
For some time now, Unity has been changing its APIs to use a data-oriented model, as Scriptable Objects and Addressables clearly demonstrate. The main idea is to rely on data rather than systems. That data is an asset in your project — a file on your hard drive.
In the past, working with terrains was a nightmare if you had too many scenes. Now, however, Unity has improved the Terrain Tools to use the same architecture. This tutorial is about the new Terrain Toolbox API and new features in the Terrain component.
By the end of this tutorial, you’ll:
- Know how to install the Terrain Tools API and understand its user interface.
- Understand the new Terrain Toolbox workflow.
- Be able to create new terrains.
- Learn about Heightmaps and Splatmaps.
- Learn about layers and painting terrains.
- Discover all of the new brushes and some masks.
- Create your own landscapes.
You’ll get plenty of practice creating peaks and valleys, culminating in a full mountain scene.
So what are you waiting for? Dive in!
Getting Started
Download the sample project by clicking the Download Materials button at the top or bottom of this tutorial.
Unzip the files to a convenient location. After extracting, you’ll see the Starter and the Final project folders. Feel free to explore these projects to familiarize yourself with their contents.
When you’re ready, open the Starter project in Unity and buckle up.
The project contains some folders to help you get started. Open Assets/RW, and you’ll see the following:
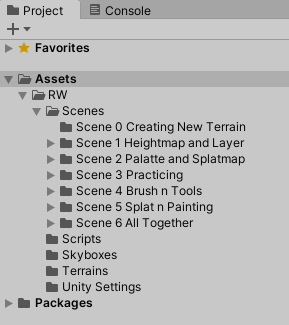
Here’s what each contains:
- Scenes: The scenes you’ll work on and the related assets you’ll use. Each scene is specific to one part of the tutorial, and the final one brings everything together.
- Scripts: A premade script to control the Camera.
- Skyboxes: The skyboxes used in the project.
- Terrain Assets: Terrain brushes, layers and textures.
- Terrains: The terrains you’ll create. As you’ll see later, these form your TerrainData Directory.
- Unity Settings: The Universal Render Pipeline settings this project uses.
All the necessary assets and scenes are arranged and numbered inside the Scenes folder.
The starter project already contains the packages you need to get started. However, you’ll still need to import two additional packages: the new Terrain Tools and an Asset Sample Pack. These will let you use the Terrain Tools at maximum power.
Installing the Terrain Editor
First, go to Window ▸ Package Manager and select Unity Registry in the Packages drop-down menu in the upper left corner. Select the settings gear in the top right, then select Advanced Project Settings. Make sure the Enable Preview Packages option is checked.
Now, in the search box in the upper right corner, enter Terrain Tool. The Install button will appear in the bottom right corner. Press it and wait until the download completes.

One package down, one more to go!
Installing the Terrain Tools Sample Asset Pack
At this point, you’ve installed the Terrain Tools. To get the most out of them, however, you’ll need some brushes and textures.
Next, you’ll download the free Terrain Tools Sample Asset Pack by clicking the Download Asset Samples from Asset Store button, which is also in the Package Manager.

Once you do this, a browser window opens showing the Unity Asset Store. Click Open in Unity, as shown below. Finally, back in Unity, press the Import button in the Terrain Tools Sample Asset Pack window, and you’re good to go. Make sure to check all the boxes!

- If you see an Add to My Assets button instead, you might have to sign in to your Unity account. Remember to sign in to the same account as you did in the Editor.
- If Unity hangs on Update, press the Open in Unity button in the website again.
- If you see an Add to My Assets button instead, you might have to sign in to your Unity account. Remember to sign in to the same account as you did in the Editor.
- If Unity hangs on Update, press the Open in Unity button in the website again.
Finally, you’re done. Now, tighten that seat belt because the ride’s about to begin!
Understanding the Terrain Toolbox as a Toolbox
Before diving in, take a moment for some necessary theory. There’s no way to emphasize enough the importance of understanding the core concept behind the new Unity Terrain Toolbox. If you’re a Lord of the Rings fan, you can think about the Terrain Toolbox like this:
One API to rule them all,
One API to find them,
One API to bring them all
And in the Terrain Toolbox bind them.

(Un?)fortunately, there are no rings, no darkness and no Lord of the Terrains in here — but the Terrain Toolbox does bring all your terrains together and rules them all.
Following this metaphor, the Terrain Toolbox is a real toolbox. This API is an interface between all your scenes and your Project files. If you need to do anything with terrain, the Terrain Toolbox is your one-stop destination.
So how does the Toolbox look? Go to Window ▸ Terrain ▸ Terrain Toolbox and open it.

Basically, it’s a window containing a toolbar with some buttons on the top. Those four buttons are the main Toolbox tabs.

And that’s all you need to know to get started! Next, you’ll create your first terrain and start using the toolbox.
Getting to Know the “Create New Terrain” Tab
First, look at the Create New Terrain tab. It goes without saying that this is the tab where you create terrains. However, since Unity has added so many new features, you’ll get to know them one by one. Remember, the new Toolbox handles not just one, but lots of terrains at a time.
To start, open Scene 0 located in RW/Scenes/Scene 0.
Notice that this tab has five sections:
- General
- Import Heightmap
- Gizmo
- Preset
- Options

Next, you’ll examine the most common and useful options of each section.