Using the Terrain Tools in Unity
Learn to create and manage a wide range of terrains in your apps by using Unity’s powerful Terrain Tools and the all new Terrain Toolbox API. By Mauro Fuentes.
Experimenting on Your Own
In many ways, creating terrain is an organic process; sometimes great results come from randomly tweaking numbers and painting Picasso-esque heightmaps/splatmaps.
Before proceeding, you can take some time to practice and strengthen your knowledge. Scene 3 is your playground. Try out everything you’ve learned and experiment. Remember to check the terrain values, especially the height, and combine layers to get different results.
Once you’re ready, you’ll learn tools for adding more detail and create an entire scene you can explore!
Importing and Saving Presets
Hope you loved that last mountain! The toolbox has another superpower: You can save pretty much everything as a… can you guess? Yes! An asset. You can save almost any change you make in the Toolbox as a Preset.
For instance, your palette for Scene 2 is a preset. If you go back to Terrain Settings, you’ll also notice a Preset section. The process is the same as before: click Save to convert that preset into an asset. Don’t repeat yourself!
Exploring the Terrain Visualization Tab
Terrain visualization uses the same concept as splatmaps. Unity lets you tint different heights so you can visualize them better. For example, it could help you select better heightmaps or check the overall height of different parts of your terrain.
Also, remember this tool is relatively new; Unity will surely expand on it.
To enable altitude visualization, in the Terrain Toolbox, go the the Terrain Visualization tab. In the Visualization Modes dropdown, select Altitude Heatmap. You can use the Levels slider and list of levels to adjust the bands of color to your liking.

Revisiting the Old Terrain Component
The Terrain Toolbox is the new, shiny terrain utility from Unity. But it’s not the first time they’ve added features to create terrain, and many of the previous tools are still accessible alongside the new terrain system.
In this section, you’ll learn the fundamentals to create terrain by hand — particularly, the fundamentals for painting.
Open Scene 4. This scene has six terrains, which were created with just one click using Tiles. Each one has an array of signs with titles. The signs along the X axis represent tools, and the Z axis has an empty space for you to use.
Select Terrain_4 inside of TerrainGroup_0; you’ll see the Terrain Component.
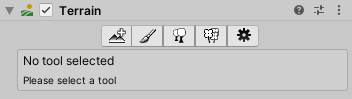
There is a row of tabs inside of the Terrain component. These tabs are, from left to right:
- Create Neighbor Terrains
- Paint Terrain
- Paint Trees
- Paint Details
- Terrain Settings
Now, you’ll explore each section in more depth.
Create Neighbor Terrains
The first button on the list lets you create neighbor terrains intuitively. When you click it, Unity will display squares to show you where to create one.
![]()
Just click where you want your new terrain to be and that’s it. You can rename the new terrain and the related TerrainData component as Terrain_4_1. Make it a child of TerrainGroup_0 to better organize the scene.

Paint Terrain
Now, spoiler alert, this is some heavy-duty stuff. The Paint Terrain has 11 different operations — and four of them have suboperations. That’s why it’s so important to follow along with the examples at least once.

Here are a few useful keyboard shortcuts:
- A: Brush strength.
- S: Brush size.
- D: Brush rotation.
- Control: On some brushes, this inverts the effect. For others, it works as a modifier.
- Shift: Enables the smoothing brush.
Next, you’ll find a big list of all brushes with a little example for each.
Reviewing the Brushes
Take into account that most brushes depend on a myriad of tweaks that change the result drastically. So, these examples are just for illustration, but try to follow them.

This tool sets an absolute height for the terrain, whether it’s in World or Local space.


Raise or lower the current height of the terrain. Use the Control key to make the value negative and carve the surface.

Paint textures onto the terrain manually.

Remove chunks of the terrain completely. Use Control to erase holes.


This tool allows you to select a mesh you like and paint with it. You can use the mesh in Scenes/Scenes 4/Geometry for practice.


Whereas the Mesh Stamp allows you to stamp with a 3D mesh, Stamp Terrain uses the 2D brush image.


This can create an incline. Control-click the terrain once to start. Click the target once to finish.


This tool is awesome! Adding noise into your terrain is an important aspect to making it feel natural. Practice a lot with it.


This creates a terraced effect. For when you want to Minecraft your terrain. :]

This tool works like the Sculpt Bridge. You click to select an area you want to copy from, then click the part you want to copy to.

Simulates erosion caused by water.

Simulates erosion caused by freezing/thawing temperature cycles.


Simulates erosion caused by wind.

So much erosion! Here’s a reminder to conserve and plant some trees. :]

Pinches the terrain, excels at creating sharp points. This tool is good for making Italian meringue!

Smudges the terrain elevation in the direction of the brush. It’s like kneading the dough for a pizza.


Twists the elevation into a swirling pattern. Awesome for swirl lollipops or some cinnamon rolls. :]


Accents the contrast between lower and higher terrain.


Sharpens peak features.


This flattens terrain while maintaining any slope in the elevation.

In the next section, you’ll expand your knowledge about painting terrains by using brush masks.
Introduction to Brush Masks
In this short section, you’ll test brush filters. You already know how to create a new terrain. Open Scene 5 in RW/Scenes/Scene 5.
Import the heightmap from RW/Scenes/Scene 5/Heightmap 5 and use these values as General Settings:
- Width: 4000
- Length: 4000
- Height: 2000
- Resolution: 1025
As always, remember to rename the TerrainData object, like you did before, to keep track of it. Press Create. The result will look like this:

Now, in the Toolbox, go to the Terrain Utilities tab, open the Terrain Layers section, and select the Palette Scene 5 preset. Then add one more layer using Texture Layer 5 by hand. Finally, move that layer you just added up to the first place and press Add to Terrain.

In this case, you don’t use splatmaps because you’re going to paint by hand.