Using the Terrain Tools in Unity
Learn to create and manage a wide range of terrains in your apps by using Unity’s powerful Terrain Tools and the all new Terrain Toolbox API. By Mauro Fuentes.
Creating Your First Terrain
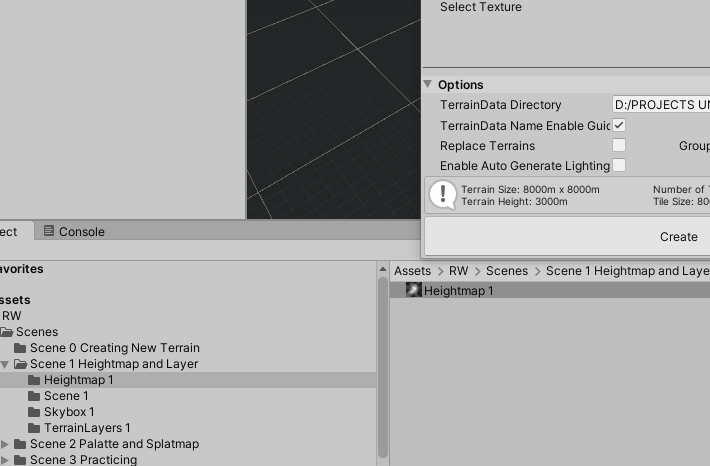
The options section is the last on the page, so it may seem strange to start with it. However, TerrainData Directory is where Unity will store all of the terrain assets you create. You’ll want to set this up first to make sure everything is saved in the same place.
Click the Ellipsis icon. In Explorer, select the existing folder, Terrains, from the path: Using the Terrain Tools in Unity Starter/Assets/RW/Terrains.
Next, in the General section, enter the following values:
- Total Terrain Width(m): 8000
- Total Terrain Length(m): 8000
- Terrain Height(m): 3000
- Group Settings ▸ Tile Height Resolution: 1025
You’ll learn more about these options in the next section.
Finally, set the material to use for the generated terrain. In the General section, under Group Settings, find the Material Override and select the TerrainLit material from Packages/Universal RP/Runtime/Materials, like this:

Now, click Create.
Lo and behold… congratulations on your first terrain!
Looking Over Your First Terrain
The new terrain looks like this:

Notice that there are three toggles at the bottom of the Options section:

Here’s what they do:
- TerrainData Name Enable Guid: Appends a GUID to the name of the terrain, ensuring each terrain asset is named uniquely.
- Replace Terrains: Keeps the TerrainData file intact, but updates the values and mesh.
- Enable Auto Generate Lighting: Enables that option in the Lighting tab by default.
Now, for the next step in the tutorial!
Understanding the General Section
The General section might seem daunting at first sight, but if you scan the text, you’ll notice it’s just a specialized Transform Component.
You’ve already used Height, Width and Length components. They do just what they describe — set the height, width and length of the terrains you create.
Among others, Tiles and Grouping ID are new features.
Grouping ID is just a number for making groups of terrains that are located near each other. Imagine, for instance, that you need to create distant mountains. You’d create a new group to keep those mountains together, and to ease distancing them from your other terrain in the scene.
Keep an eye on Tile Height Resolution. Very often, people overexaggerate the polygon count. In this tutorial, you’ll use 1025.
Also, for brevity, this tutorial will abbreviate Tile Height Resolution as THR or, simply, Resolution.
What? You don’t believe people overexaggerate? Feel free to change the THR values and see for yourself!
THR 33:

THR 65:
THR 129:

THR 257:

THR 513:

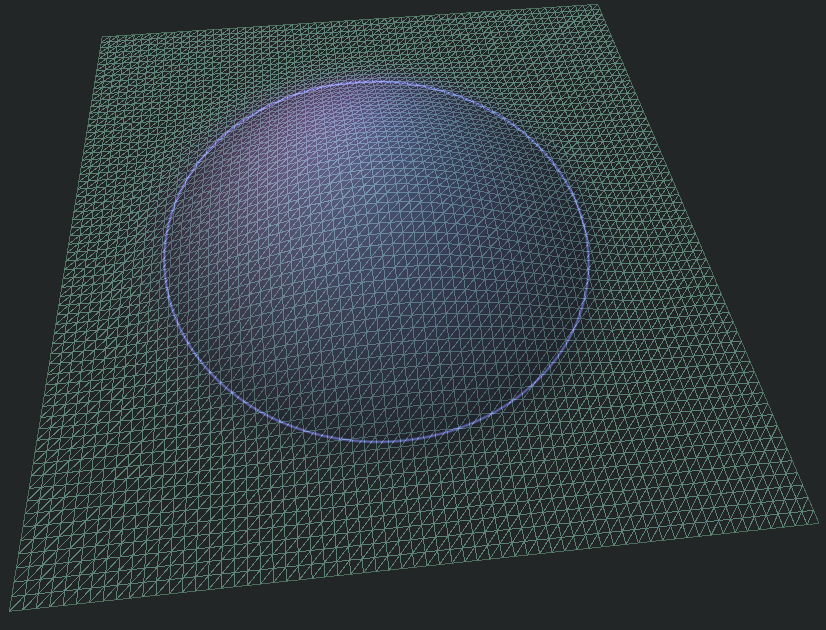
If you spend too many triangles on terrain, your computer won’t have any time left over to render your other models, like your wizards and hobbits. As a rule of thumb, if your mesh looks solid green and you can’t see its triangles, you probably have the resolution too high and can lower it down!
Now, you’ll learn about another cool feature.
Introducing the Cool New Gizmo Feature
At last! Unity added a terrain gizmo. Activate it by clicking the checkbox next to Gizmo in the Create New Terrain tab.

With this tool, it’s easy to check the boundaries and overall height of your terrains. It also gives you an intuitive idea of the extension a terrain has. Unfortunately, you can only use it on one terrain at a time.
What’s it good for? For example, say you want to raise your overall terrain height by 50%. The gizmo will clearly show you both positive and negative headroom, like this:

Take some time to play around with all the features. Create as many terrains as you want. When you’re ready, go to the next part… where the real fun begins.
Importing Heightmaps
Heightmaps are among the most important and fun tools at your disposal.
Before you begin, switch to Scene 1, located in RW/Scenes/Scene 1.
You’ll notice every folder has a number. That’s because they follow an asset-oriented pattern that relies on instances of objects, so it’s useful to know which scene they belong to.
Now, go to the Terrain Toolbox. Select the Create New Terrain tab and click the Import Heightmap toggle to activate it.

Inside Scene 1, there’s a heightmap that’s ready for you to use.

Now, make sure the texture format of Heightmap 1 is R 16 bit, then drag and drop it inside the empty box on the Toolbox’s Import Heightmap section (the Select Texture field).
Now, go back to the General section and use these values:
- Width: 8000
- Length: 8000
- Height: 2500
- THR: 1025
Finally, take a deep breath and press Create. Behold!

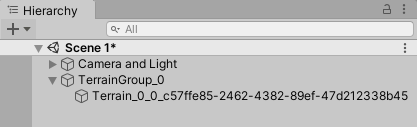
Your Hierarchy will now have a parent GameObject showing the terrain group and the terrain you’ve just created as a child.
Look at the name and you’ll see it’s a little… long. Again, Unity appended this name with a GUID to keep your terrain names unique. For the sake of this tutorial, rename it to Terrain_1.
Select it and you’ll see the same old Terrain component in the inspector along with Terrain Data.
As a mental note, Terrain Data is an asset. It’s inside your project, located in the TerrainData Directory you selected earlier. Click it so you can rename it to Terrain_1, too.

Is that it? Of course not. Just for a little taste, do this:
- Select the Terrain_1 GameObject.
- Go to the Terrain component.
- Select the Paint Terrain tab.
- In the first dropdown below the row of tabs, select Paint Texture.
- Find the Layers section.
- Click Add Layer.
- Find TextureMountainLayer 1 and select it.
Boom!

Wait, it doesn’t look so good? Gotcha. Go to the Terrain Settings tab in the same component and adjust Base Map Distance to maximum.

This is the final result:

And there you go. Next, you’ll take a look at the Terrain Settings tab.